Installing a Cast Iron Router Wing in my SawStop PCS
For the past few years, I had been running a Ridgid TS-3650 and one of the more popular articles on this blog was about how I installed a cast iron router wing in its left side. Â That worked great. Â A few weeks ago though, I got really lucky and spotted a used SawStop PCS on Kijiji and I jumped at it. Â SawStops come up on the used market around Toronto less often than once a year. Â I had been looking at buying one new for a long while, but one of the things that stopped me was honestly that I liked the router table being in the left wing of my Ts-3650 that much. Â The price was right though, so now I’ve sold my Ridgid and I’ve moved all of its upgrades over to the SawStop.
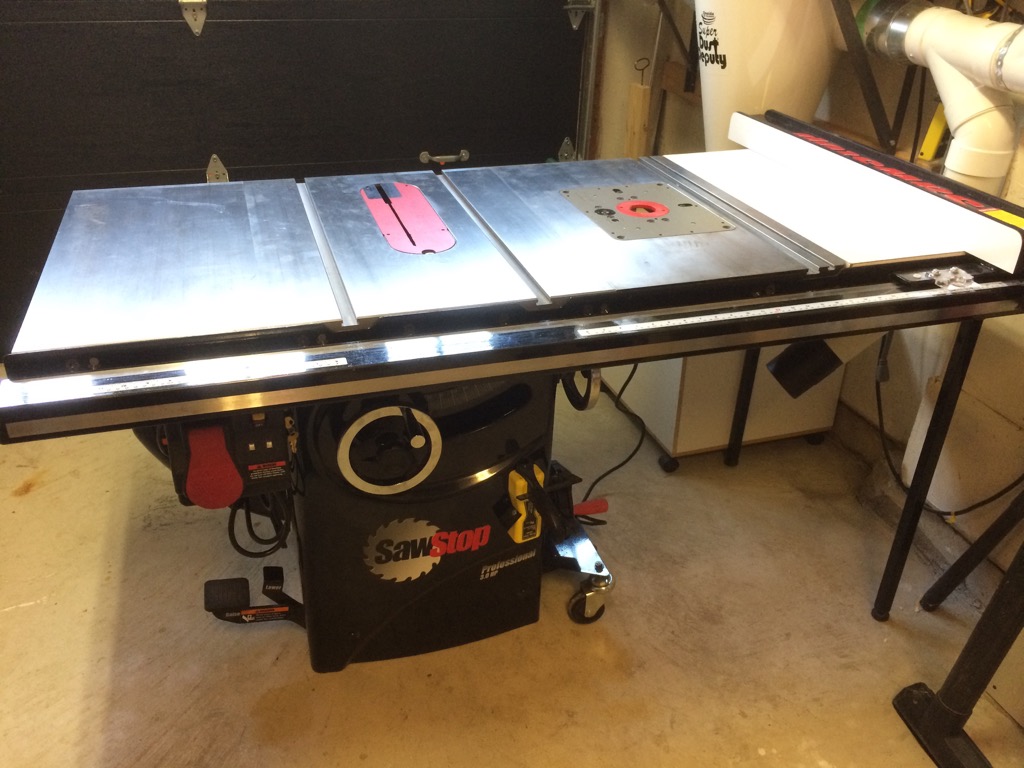
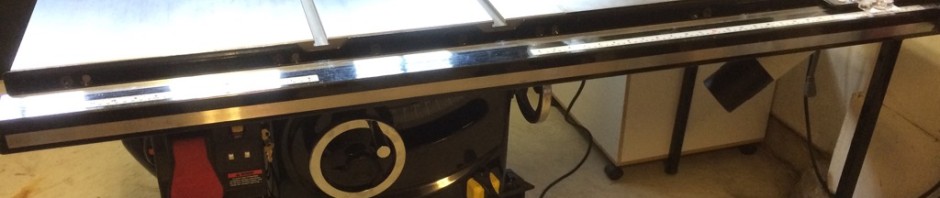
In its new home.
I won’t repeat my review of the features of the router wing here, but I will say that some years later, I’m still loving it. Â Once you’ve tried a cast iron router table and a router lift, you will never look back. Â You can check out my article about installing it on my Ridgid Ts-3650 for more information about the router wing itself, and I also have an article about the low-priced Jess-Em Rout-R-Lift II router lift that I use in it.
The SawStop is a left tilt cabinet saw which presents some minor challenges for mounting a router wing when the right side of the saw is up against a wall.  You can’t mount the router wing on the left side like on the Ridgid, because there is a motor cover there.  I would really have preferred to have the router on the left, but it just wasn’t going to happen.  The other option is to replace SawStop’s pine and laminate right side extension table with the router wing.  That would require drilling some new holes in the router wing, but mounting it should be feasible.  The router wing would definitely make the saw tippy, which could pose some difficulty using the built-in PCS mobile base, and it would make the levelling legs particularly important, but I don’t think the beefy T-Glide fence rails would have any difficulty supporting the weight with the legs in place.
Because of how my space is configured though, I decided to mount it as a replacement for the original cast iron wing on the right side. Â I was slightly worried that I would have difficulty reaching the router from the front of the saw, but this turned out to be ok. Â I’m about 6′ tall, and the SawStop table sits a little lower than the TS-3650, so I can reach the bit alright leaning over just a little.
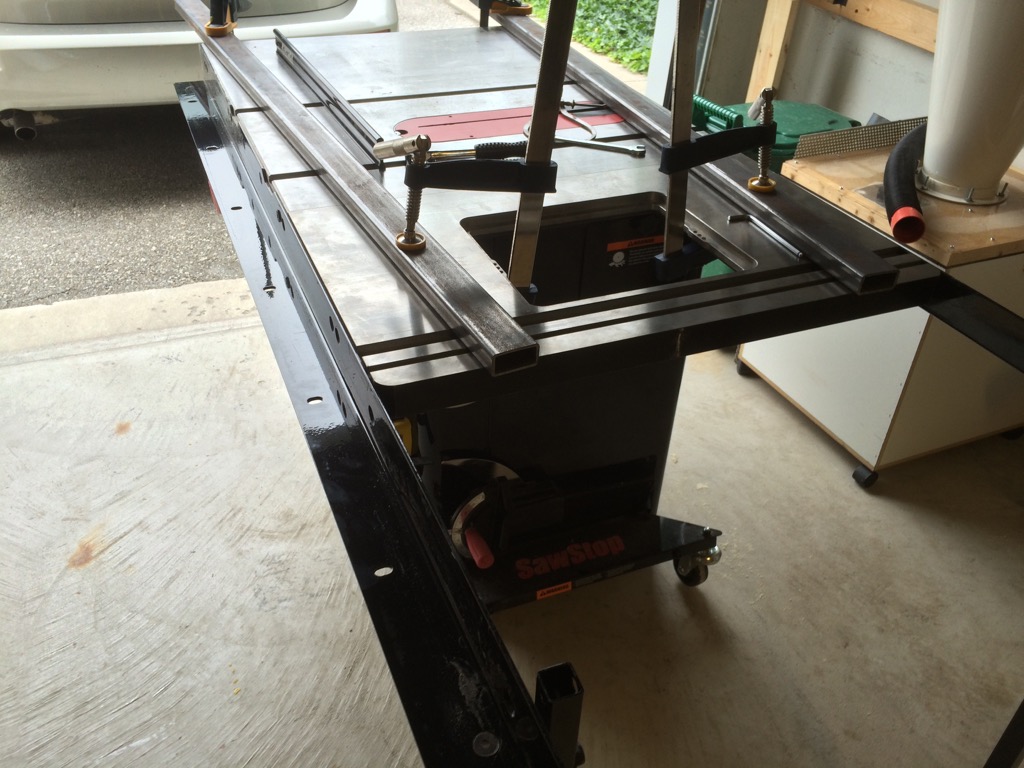
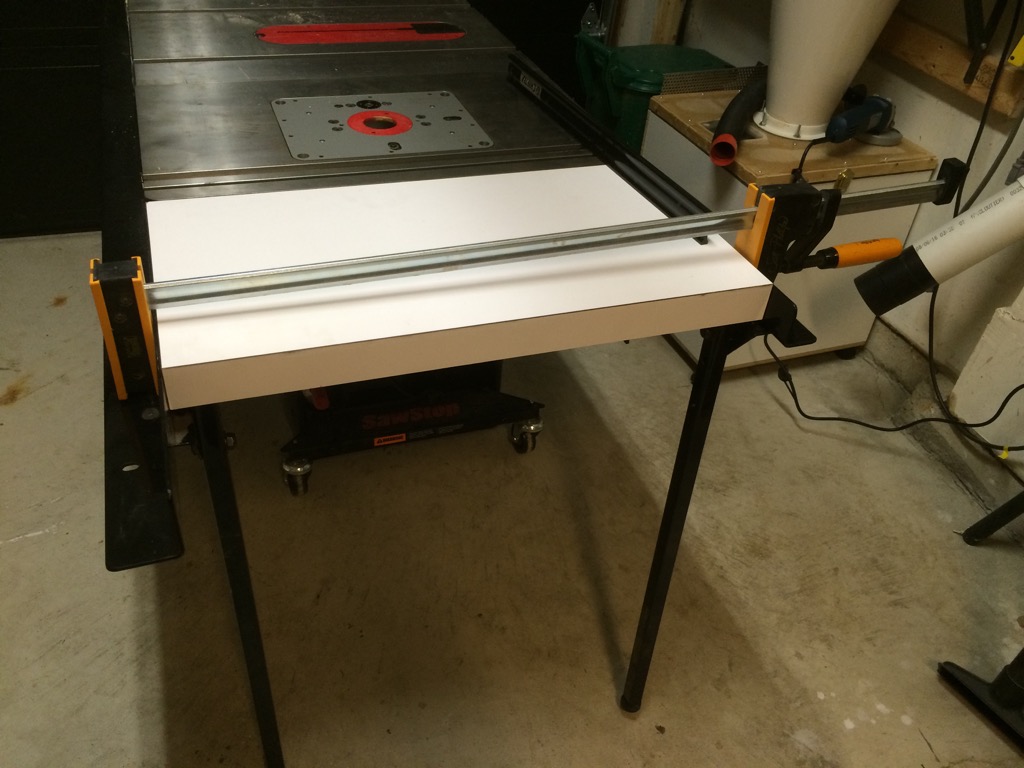
Steel tube and clamps hold the router wing in alignment as I find the bolt holes
Like I did on the Ridgid, I clamped straight lengths of material across the router wing to hold it up as I found the bolt holes.  I happened to have some heavy steel tube around this time, so I used it, but 2x4s would have been every bit as good.  The steel tube I had was so heavy it almost counterbalanced the weight of the casting, but getting it in place was a bit of a struggle, and I had to put it on and take it off several times as I marked, cut and fitted the various holes.
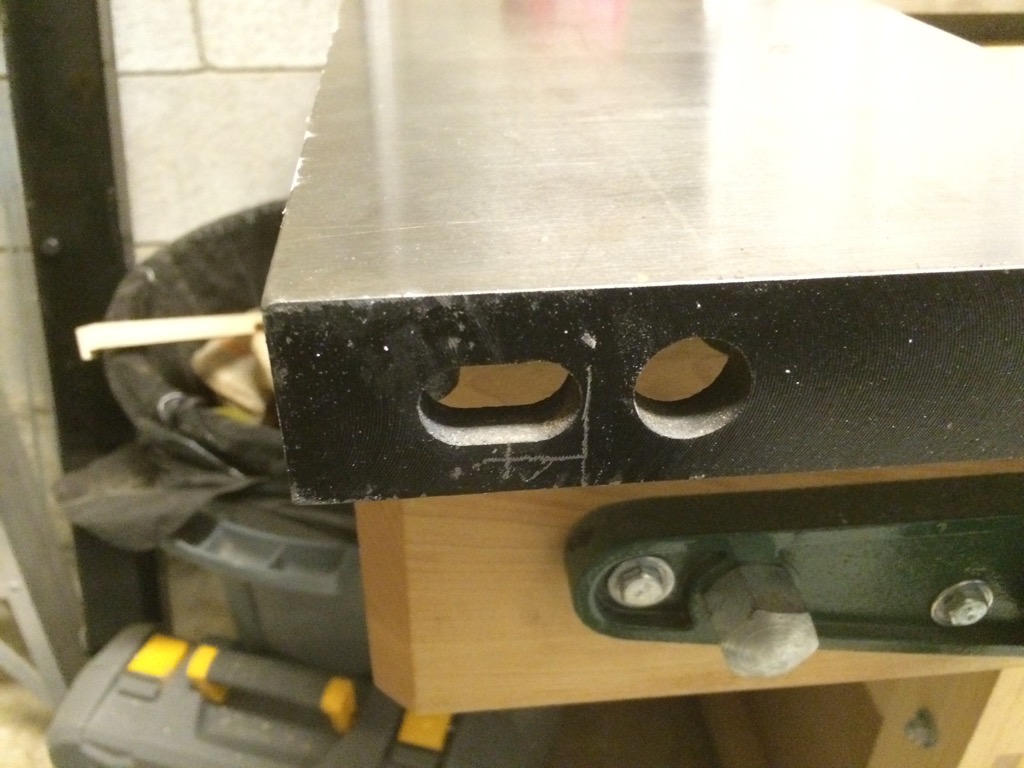
This bolt hole needed to be re-shaped a little to suit the table alignment bolts
The router wing didn’t require much modification to fit. Â I drilled holes on the front and rear edges to match the T-Glide fence rail’s holes. Â My holes were clearance-sized to allow aligning the table nice and flat. Â The SawStop has a very nice table alignment setup – allen bolts accessible from the underside of the table at the rear can be used to very precisely align the tabletop (and mitre slots) with the blade and keep it from getting bumped out of place. Â These bolts are accessed through a hole in the edge of the extension wing casting. Â To be able to access the allen bolt on the right side after installing the wing, I needed to grind away a little of the cast iron near the rear mounting bolt on the wing. Â I did this with a Dremel grinder but I didn’t grab a picture of the finished product.

Just before painting
The fence rails needed to be notched to allow for the mitre and accessory t-track slot in the router table. Â I did this simply by marking out the locations with a marking gauge, bevel and a ruler then using a hack saw, grinder and files to refine the notch. Â Once I was done, I dabbed on some black enamel paint I had kicking around in the basement and I was quite pleased with the end result. Â If I use the mitre gauge with it, I’m going to have to do so from the back of the saw, but I very rarely do that, so I’m not too worried.
Wish I had black laminate on hand….
The last modification needed was to replace the pine-and-laminate extension table. Â Since the router wing is about 4″ wider than the original wing, the extension table didn’t fit anymore. Â I made mine from a 12mm baltic birch top wrapped with pine edges 2″ wide and installed some plastic laminate. Â Unfortunately, I only had white and didn’t want to go buy a sheet. Â To ensure that the extension table would fit between the wings, I set my rip fence to 27″, then IÂ clamped a block to the table with two scraps of the laminate between the block and the fence, removed the laminate scraps, then moved the fence over to touch the block again. Â This gave me the space necessary and I was lucky enough to get it right on, so no shimming was necessary. Â If you’re going to make a mistake here, err on the small side and shim between the fence rail and the table. Â I left my extension table short of the end of the rails because I wanted to be able to fit dust collection pipe between it and the wall. Â The T-Glide fence has a fair amount of rail to the right of the fence itself, so even though the rails stick out a bit with my extension table, the fence is fully supported right to the end of the rail.