Router Wing Dust Collection
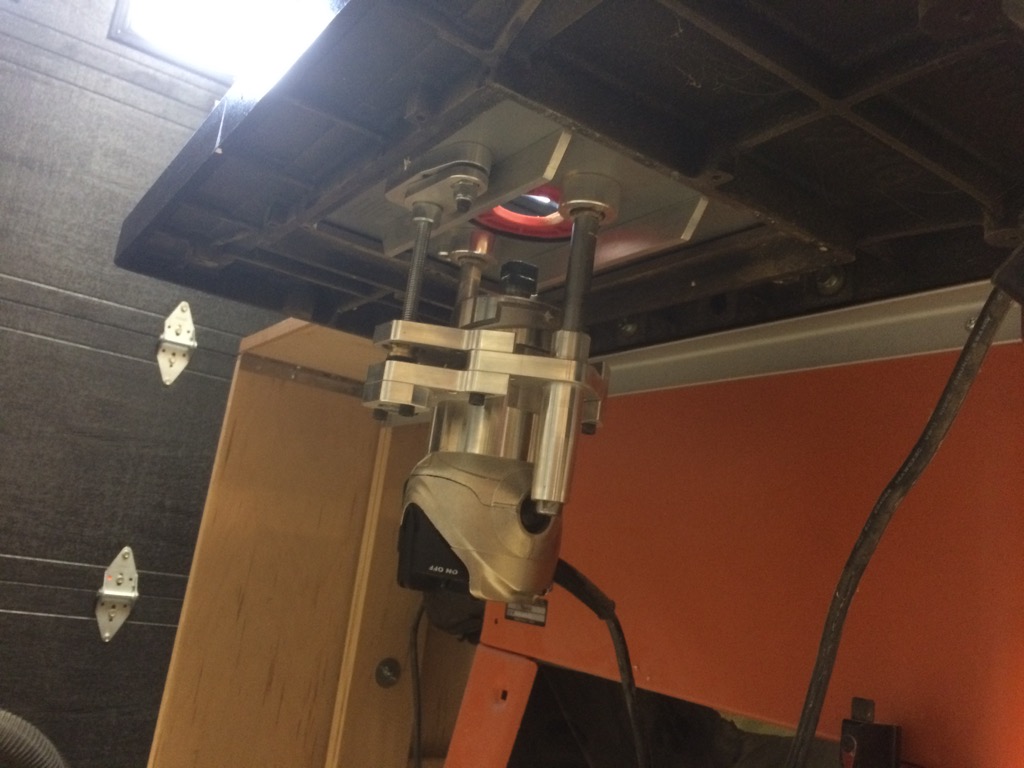
The bottom of the cast iron router wing is designed to accept dust collection.
Most of the time, when I use my cast iron router wing and my router lift, I use it for work at the edge of a board, and the dust port on my fence works fine. Â It always lets a little bit of dust escape to be swept up, but never enough to bother me. Â Recently, I used it for running some 1/4″ dados on my lathe tool rack, and because those cuts weren’t near the edge, all the dust went on the floor. Â And because the router cools itself by blowing air through the motor toward the bit, it scattered dust in a 3′-4′ radius around the table. Â Quite a mess.

Who said crayons are just for kids?
AÂ pre-made sheet metal dust shroud is available from General International that is designed for this cast iron router wing, and it’s even pretty reasonably priced, but it’s pretty cold out around here right now and I had a pile of scrap MDF to use up, so I decided to stay in and build one. Â First order of business was determining how to mount it under the table. Â There are 6 tapped holes in the underside webbing of the table to accept the sheet metal shroud. Â The threads are metric, 6mm. Â To get the hole pattern, I took a piece of paper and taped it to the side of the router wing. Â I then used a crayon to get a rubbing of the screw locations and the perimeter of the opening. Â I transferred the rubbing to a piece of 1/8″ hard board using an awl and a knife, then cut the pattern out on my band saw. Â For the holes, I drilled 3/16″ and pushed 3/16″ machine screws through to make sure that my rubbing was accurate. Â I held the pattern up and put all of the screws into the bolt holes under the table, and they fit well enough.
Nothing fancy here. I didn’t even choose my screw lengths carefully.
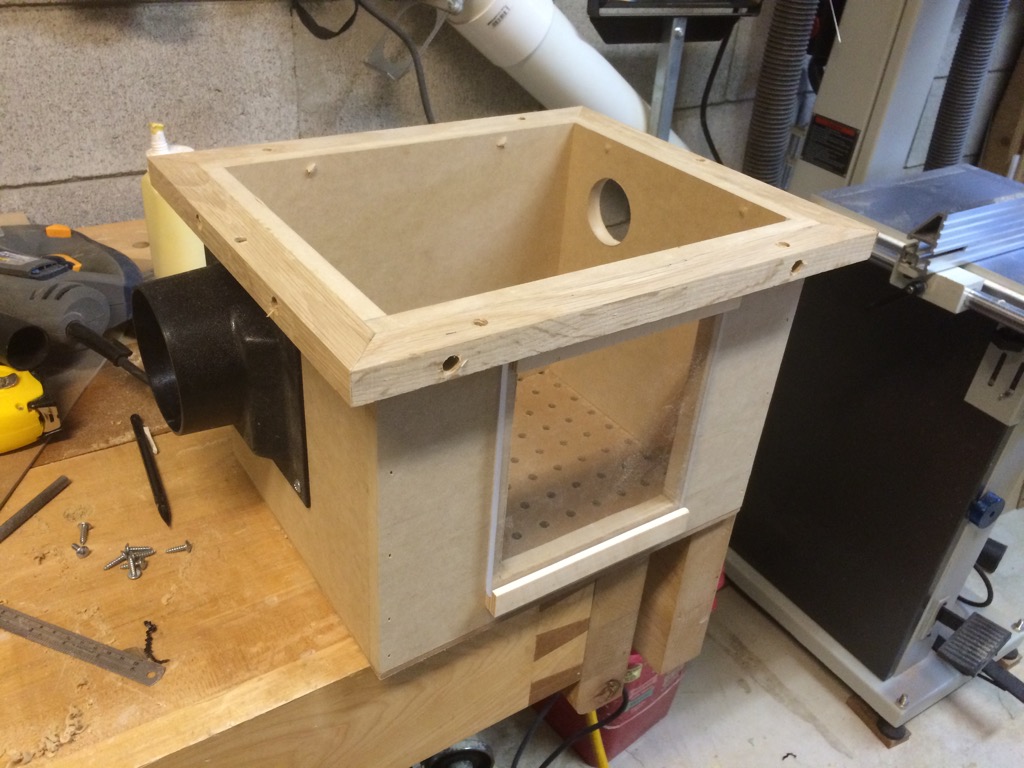
The box itself is 1/2″ MDF with a bottom made of 1/4″ peg board.  Nothing fancy – just butt joints and brads.  The peg board allows air to enter the bottom of the box so the router has air to cool itself with and to keep the airflow going in the right direction.  I stapled the peg board without glue just in case that turns out to be a bad idea.  There is a 2″ hole on the side opposite the dust collection hose connection to allow the power cable to pass through.  It’s located in the top corner so that the airflow it allows will pass over the top of the router.  The dust collection hose fitting is a pretty standard dust collection fitting that you can get at woodworking stores, and it takes a 4″ hose.  The mounting flange is mitred, glued and screwed oak that I had sitting around.  I marked the holes through my mounting template after all the glue dried.

This simple sliding door works smoothly and was made entirely with scraps.
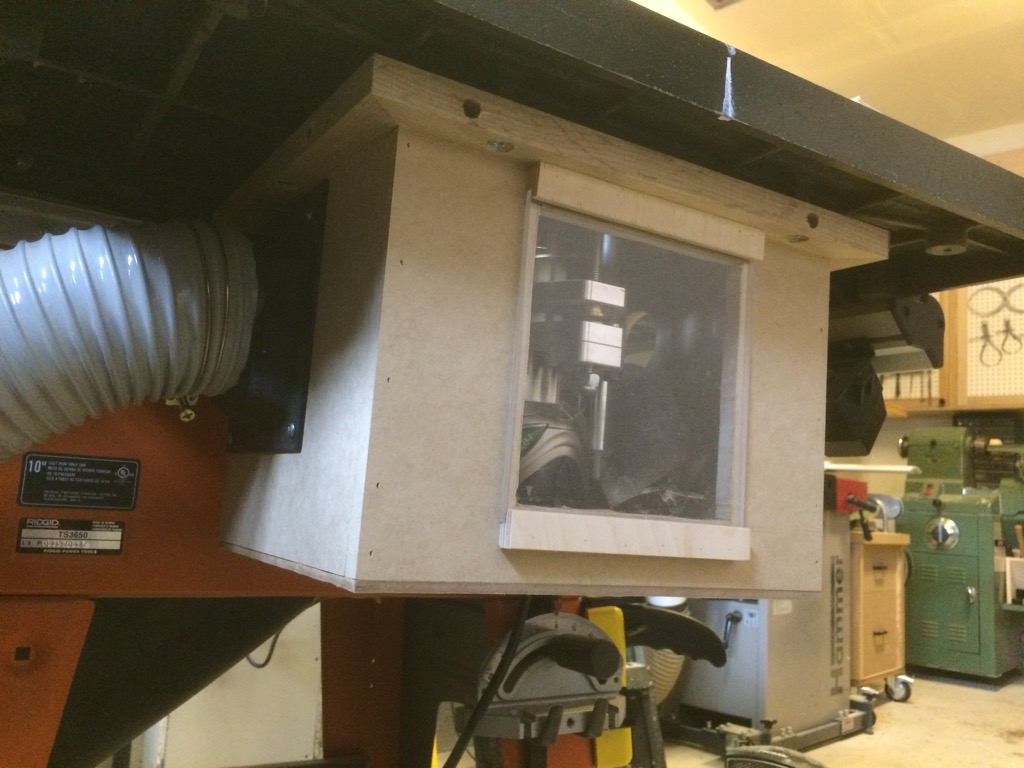
The plastic door was the simplest thing I could come up with based on what I had on hand.  The door itself slides, and it is 0.220″ clear acrylic that I had sitting in my scrap bin for at least 5 years.  The tracks are very simple.  Each one is 6mm baltic birch; a 1/2″ wide piece laminated to a 3/4″ wide piece to make a rebate for the door to ride in.  With the box on its side, I set the top 1/2″ wide piece on the side of the box, glued and tacked it with 22 gauge pins.  I then set the 3/4″ wide piece on top of  the 1/2″ wide piece, glued and tacked it.  With the plastic in place, I then set the 1/2″ wide strip for the bottom runner in place, leaving a 1/32″ gap between the plastic and the plywood strip and affixed that with glue and pins.  Finally, I added the 3/4″ wide strip and tacked it down too.  The door slides very easily because the 6mm baltic birch is slightly thicker than the 0.220″, and the 1/32″ clearance vertically is pretty generous.  It’s a little wobbly with the suction off, but with the dust collector running, it snugs up against the side of the box and stays put.
Now I just need a router table switch for outside the box.
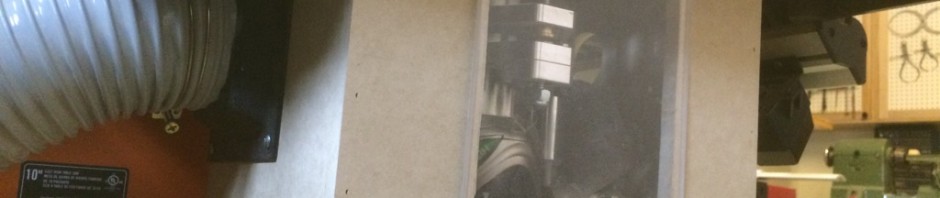
This seems to have been very successful. Â I tested it by running some 1/2″ wide, 3/16″ deep dados in MDF. Â If I fed quickly, I found that the router bit threw the dust forward through the dado a bit, but with a more relaxed feed rate, everything was getting sucked down under the table quite nicely and I didn’t end up with much dust in the air at all. Â I’m quite certain that this will be a nice improvement for cuts on the edges of boards too, because what little used to go on the floor will now end up captured by this enclosure. Â For now, I’m opening the door to get at the router switch, but I’m going to pick up a router table switch box as soon as I can find one that has a long enough cord to reach my receptacle.
Comments: 1
[…] February 2, 2015: Â I’ve recently added a dust collection box under this router wing to collect dust from under the table in addition to the dust port on my […]
Comments are closed.