Folding Out Feed Table for my SawStop PCS
I recently snagged a rare deal in the Toronto used machinery market:  a used 3HP SawStop PCS with a mobile base.  It’s a great machine and it takes up less space than the Ridgid TS-3650 contractor saw it replaced.  Unfortunately, when you get a new table saw, you realize just how deeply integrated into your shop setup your old one was.  My Ridgid’s out feed table regularly served as a drying rack, assembly table and random sorting space in addition to holding up long boards so they could safely be ripped.  Now I find myself needing to replace all of those functions in a hurry.
The length of the table was limited to 24″ in order to clear the dust collection fitting, but that’s plenty. It could have been wider, but I felt it would be in the way.
I had two main regrets with my previous out feed table. Â First, it didn’t let the saw tilt to 45°. Â When I tilted it, the motor hit the support arm that held up the out feed at around 34°, so that was as far as it tilted. Â In general, I never tilted that saw because of this. Â Second, I had the end of the table held up by legs that folded down, extended to the floor, and had to be secured using wing nuts. Â So setting it up meant clearing the space behind the saw followed by a very awkward operation to lower the legs and I usually just eyeballed whether it was sitting flat with the table. Â So sometimes the end of the table was a little high and sometimes it was a little low. Â And sometimes, the legs weren’t long enough because my floor is fairly uneven.
These steel tubes helped test the stability of the saw with a load cantilevered off the back.
With this out feed table I set out to make it so simple to set up that I could extend it in just 5 seconds.  I went through a few different design iterations before I managed to achieve this.  I also wanted to make sure that no matter where the saw was in the shop, the table was flat and reasonably co-planar with the table saw’s cast iron top.  So the legs couldn’t sit on the floor if I wanted to achieve both of those goals.  This meant that the table was going to be cantilevered off the back of the saw cabinet.  That’s usually impractical on a contractor saw because of the placement of the motor and their lighter duty legs, but on cabinet saws with angle-iron fence rails, this is not a problem.  To make sure I wasn’t going to cause a stability or tipping problem, I clamped some steel tubes to the table top, cantilevered out to the same distance as I intended to have the out feed table extend from the back of the saw, and I very scientifically applied 200 pounds of force to the end of the tubes.  And by scientifically, I mean I pushed down on it with my hands and when that seemed stable enough, I lifted my feet off the ground and didn’t fall.  Seemed ok.  See?  Science.
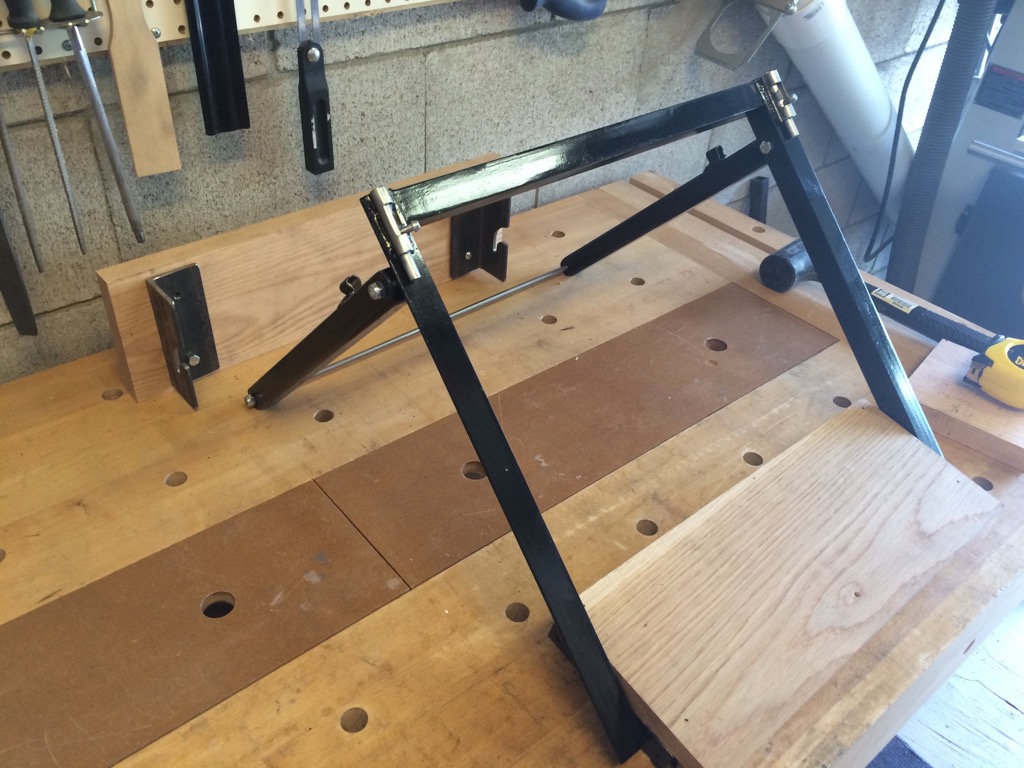
Here is the folding leg assembled on my bench.
I recently learned how to weld and got myself a MIG/Flux Core welder, so for this project I decided to use some steel angle and square tube.  I don’t have shielding gas yet, so I was using flux core and that worked just fine.  The paint did wonders to make my ugly welds look better than they are.  The idea was that the leg would fold in the middle and I’d use angles for the top and square tube on the bottom.  The angles overlap on top of the square tube to keep it from extending past straight.  I welded on a crossmember angle between the two steel angle legs to keep the upper legs from twisting, spreading or buckling.  The leg was arranged so that gravity would help to keep the leg straight too, but I didn’t want an accidental bump from below to cause the leg to fold, so I welded some barrel bolts to the top to prevent that.

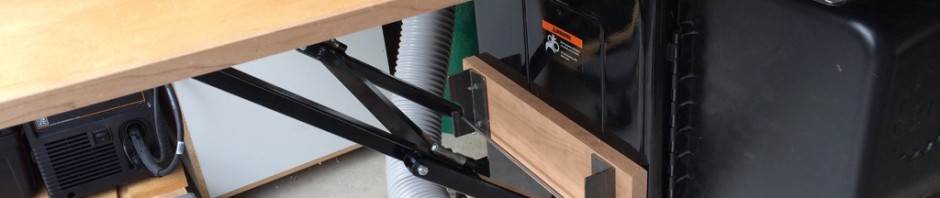
This heavy angle bracket allows the lower leg to shift upward so the top of the leg doesn’t hit the cabinet while folding it up.
I had originally intended that both ends of the legs would pivot on bolts at fixed positions, but because the steel angles overlap the tubes by a couple of inches to keep them straight, the end of the steel angles would hit the cabinet as the legs fold, preventing the table from folding down all the way.  To solve this problem, I made a bottom mount that allows the leg to lift out so the leg can fold toward the extension table before it hits the cabinet.  A jig saw with an appropriate blade and some files makes this far easier than you might think.  If you intend to do something like this for yourself, it should be possible to use fixed mounting points, but you’ll need to space the bottom mounting point a little bit further off of the cabinet back than I did.  It would be a really good idea to prototype this motion using wood or cardboard or something before going to the trouble to make it out of steel – I wish I had done that.  The steel angle I used for this bottom mounting bracket was 2″x2″ and 3/16″ thick – it’s not going anywhere.  A 1/4″ steel round rod spans the gap between the bottoms of the legs and slots into the angle bracket mounted to the cabinet.  To affix these to the legs, I threaded the ends of the rod using a 1/4″-20 die and secured the ends of the rod inside holes drilled in the end of the leg with nylon lock nuts.  The other thing worth noting about the bottom mount is that the SawStop cabinet isn’t perfectly rigid, and mounting the steel angle directly to the cabinet allowed the cabinet to flex inward under pressure, making the table springy.  To prevent that from being a problem, I mounted the angle on a piece of scrap oak.  With the load spread across the whole cabinet back and most importantly, overlapping the corners of the cabinet, it’s solid enough.  The bolts for the foot mounting brackets run all the way through the oak into the cabinet and are affixed with nylon lock nuts.  I don’t plan to put really heavy weights on this table.
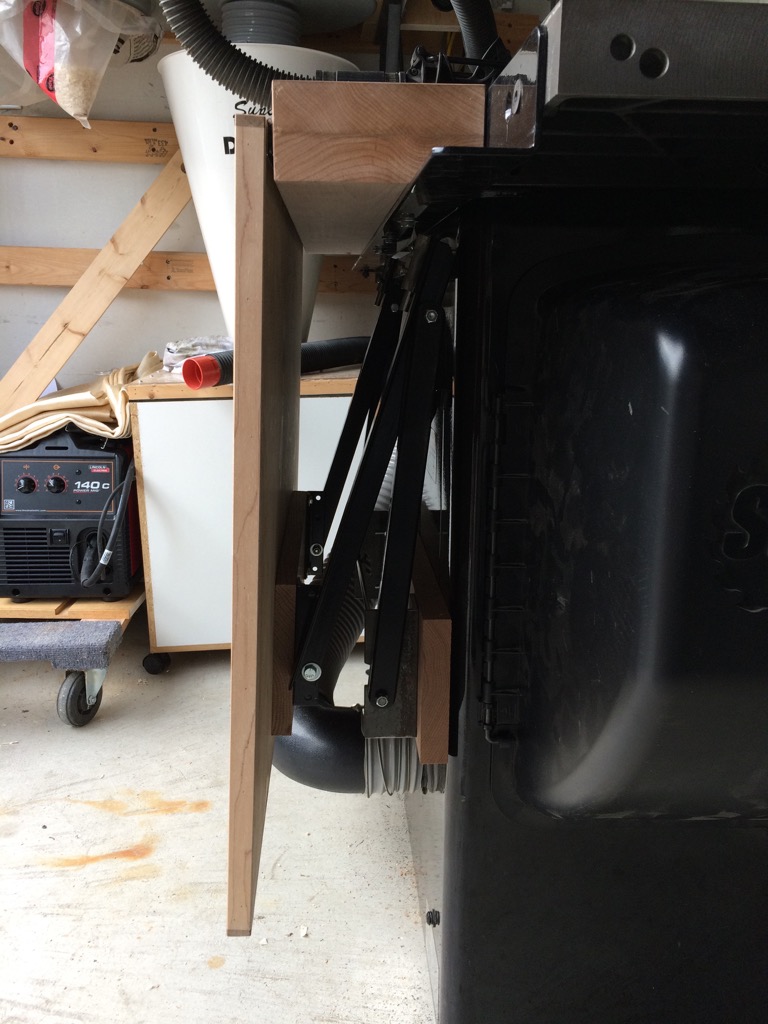
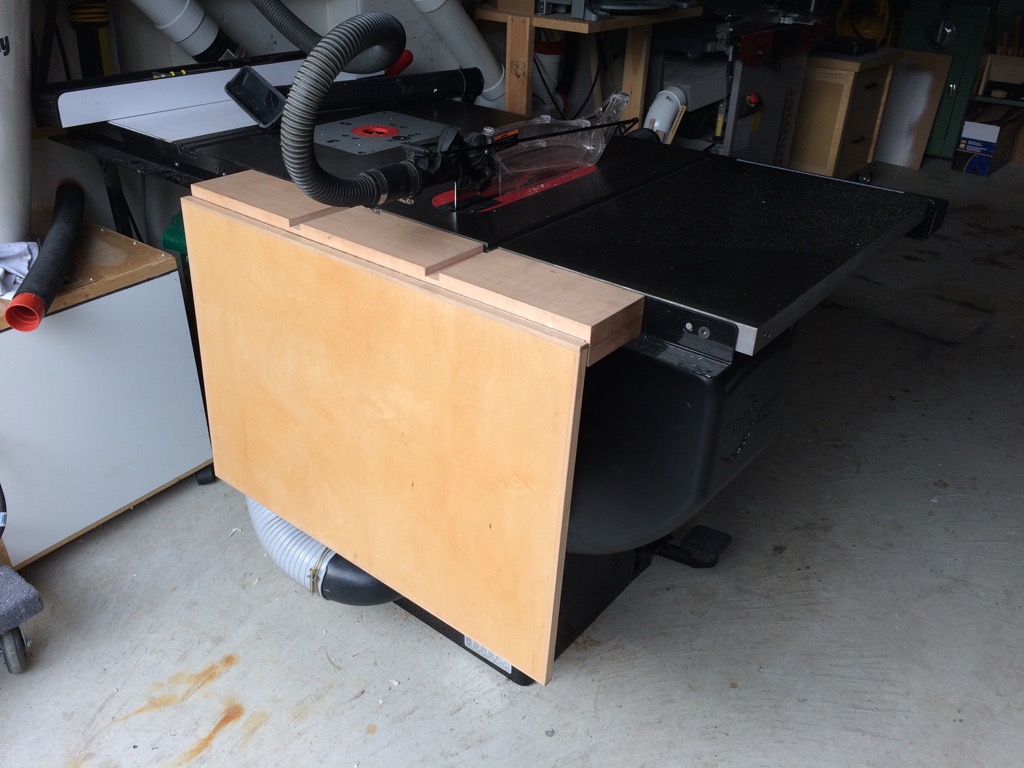
Folded, the table provides a small amount of out feed support as well as protection for the dust collection fittings
The SawStop PCS really doesn’t have a whole lot of support at the back of the blade, and I suspect most table saws are like this, not just the SawStop.  So to ensure I’ve always got a little bit of support back there, even when I’m not using the full out feed table, the out feed table mounts to a block of solid maple that I lag bolted to the rear fence rail using the holes that the manufacturer included in the rear rail.  I carefully planed the block so it would be about 1/32″ below the surface of the cast iron table and bevelled the leading edge just in case of expansion.  The width of this block is about 5″, which was also intended to provide enough overhang so that the dust collection elbow at the bottom of the cabinet wouldn’t get banged up when the table is folded down.  I had originally intended to add a bracket to keep the back of this block from sagging, but it seems solid enough without that for now. The folding portion of the out feed table attaches to the maple block with a piano hinge.  My old out feed table used this same piano hinge successfully for years and showed no signs of bending or giving, so I’m comfortable enough with this.
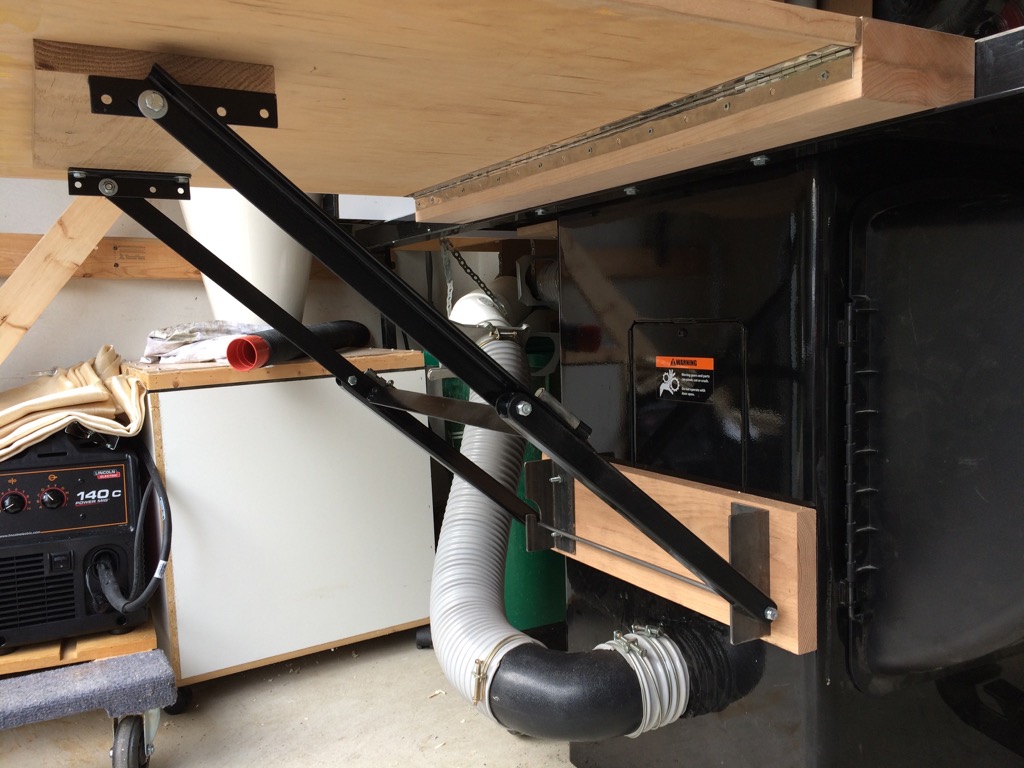
The upper end of the leg is permanently attached. The lower mounting bracket extends to the corner of the cabinet for rigidity. Barrel bolts keep the leg from buckling if bumped.
To mount and level the legs, I first affixed the bottom mounting bracket to the cabinet and made sure that it was properly parallel with the cast iron table top.  Getting this right is important to the stability of the table and the folding motion.  Since it’s difficult to get a reference point back there, I carefully levelled the saw with cedar shims under the base, then I levelled the mounting bracket with a level before tightening it up.  Then, I took my 4′ level and laid it across the table saw’s iron top.  My level has magnets on one edge, which was helpful.  With the leg hanging in the bottom bracket, I brought the extension table top up against the bottom of the level, then I lifted the leg’s mounting board up to the bottom of the extension table and put a clamp across it to hold it in place.  It is screwed to the under side of the table with 1/4″ lag bolts through the angle brackets and into the plywood extension table.
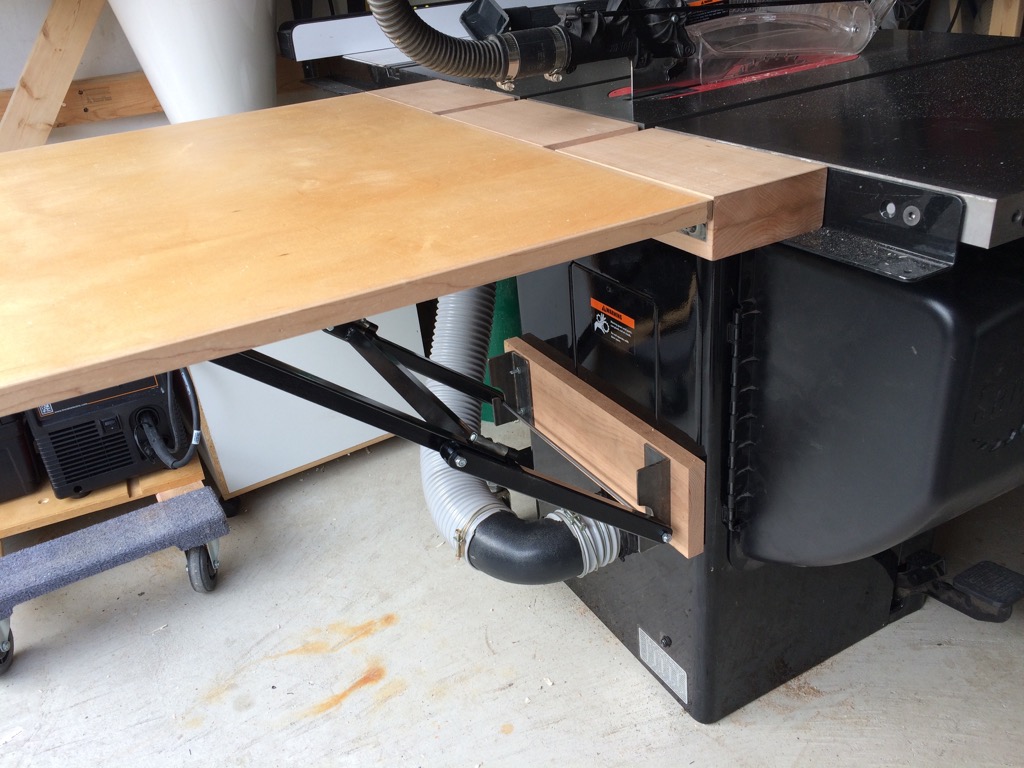
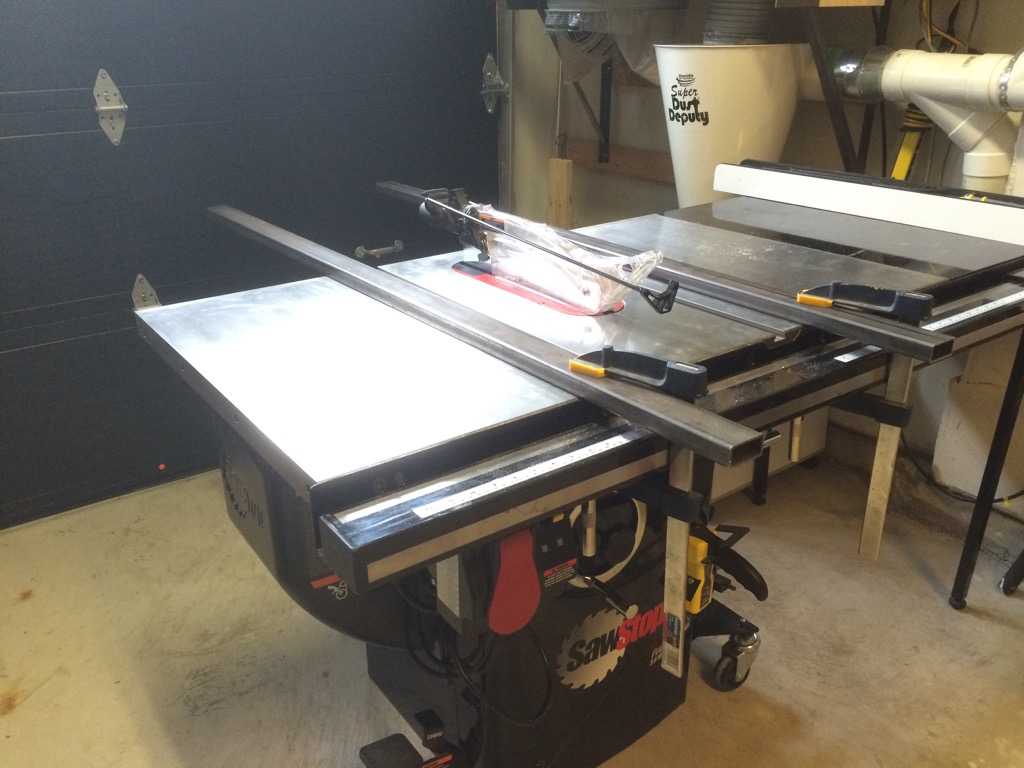
Extended and ready to cut.
So this extension table successfully meets both of my main design criteria:  it takes about 5 seconds to extend and stow the table, and it doesn’t matter if the saw is perfectly level or not, as long as it’s placed in a stable location, the extension table is co-planar enough.  With the out feed sorted out, the next thing I need to deal with is dust collection for the router wing.  My old setup on the Ridgid saw worked really well, but I can’t use that one because it interferes with the tilt crank on the right side of the SawStop.  My first crack at solving this problem failed to actually collect dust, so I’m not going to write about it until I come up with a solution that actually works.