Hammer A3-26 Shop Made Extension Tables
I have a Hammer A3-26 jointer-planer, and it’s a great, compact machine (I reviewed it shortly after getting it). It can joint and plane wood up to 10″ wide, but packing a 10″ jointer into the space normally consumed by a 6″ jointer does make handling long boards more difficult.  The longest board I’ve jointed with this machine was about 6′ long, but the user manual states that extension tables are required for workpieces that are greater than 1500mm (a little shy of 5′).  Wrestling those 6′ long boards over the thing without extensions isn’t something I want to repeat, but I’m currently building a built-in cabinet that calls for some face frame parts to be almost 8′ long.
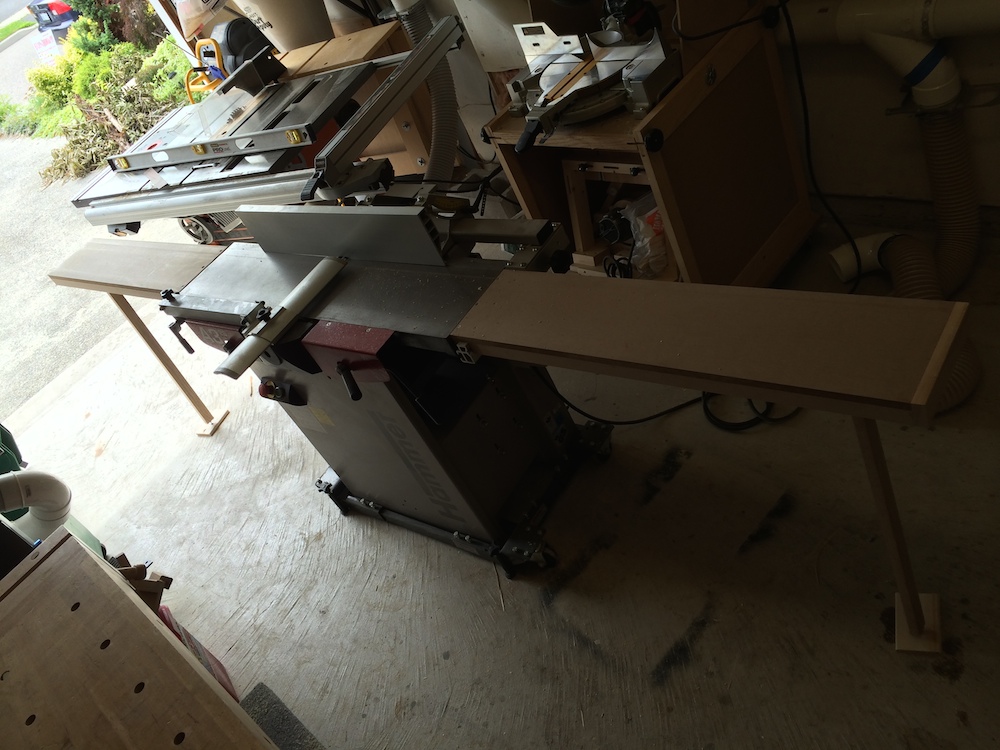
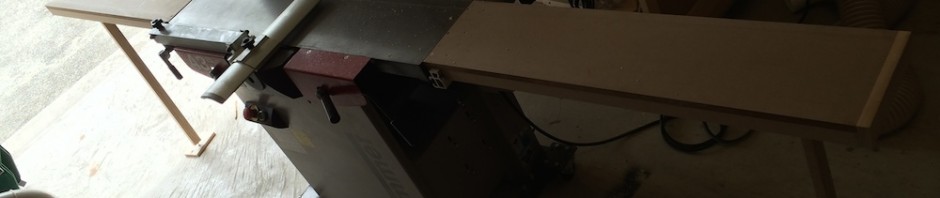
The in-feed and out-feed tables installed require the full length of my shop for clearance.
Hammer offers some very nice aluminum extrusions to extend the table and make handling longer stock easier. Â Their solutions mount on aluminum rails – the fence rail on the in-feed side, and an additional rail that you add to the out-feed side. Â But … the truth is that I hardly ever make parts longer than 4′, so I decided to try making a pair of extensions from scraps, figuring that if it didn’t work out, I would at least recover some space from my scrap pile.
Back when I made my work bench, I had successfully improvised in-feed and out-feed extensions for my old 6″ jointer that worked surprisingly well despite literally being banged together from scraps and hastily secured to the jointer tables using small C clamps.  The A3-26 is much better designed though and has some very convenient mounting points.
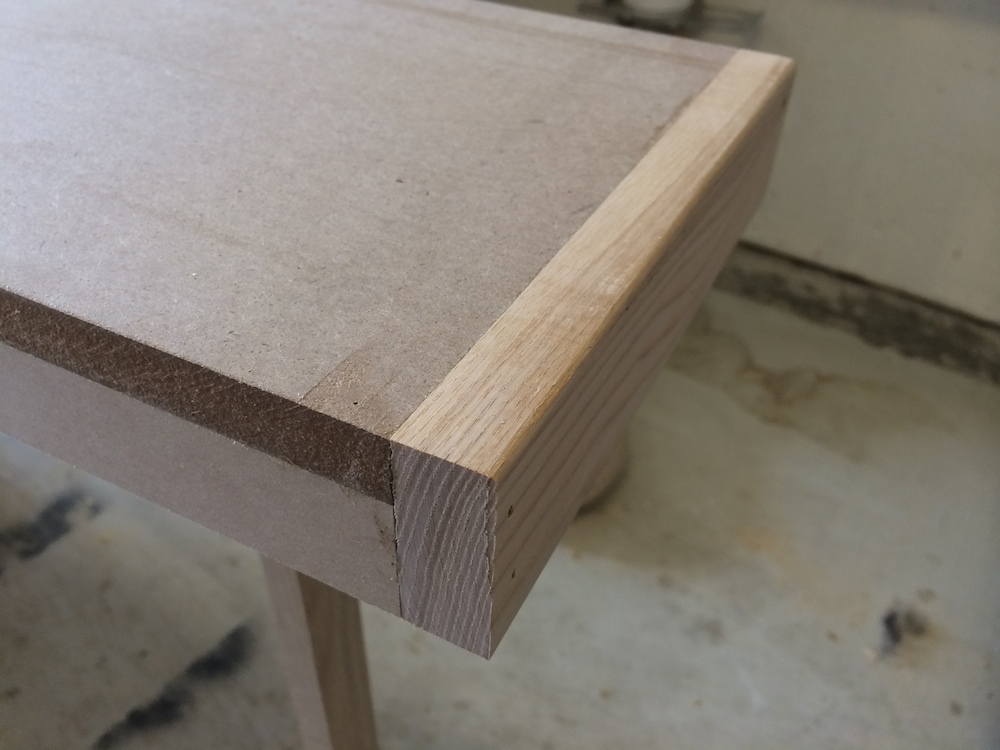
The edge is rounded over so that boards being fed don’t catch.
The extension table surfaces are simple 1/2″ MDF, reinforced with 1/2″ MDF ribs that are glued and pinned with 23 gauge pins, just to hold them while the glue dried. Â On the in-feed extension, I glued a white oak off-cut to the end and rounded it over a little bit with a block plane. Â Any hard wood would do for this, because it just keeps the MDF from getting chewed up immediately. Â The rounding over prevents rough sawn lumber from catching on a sharp edge.
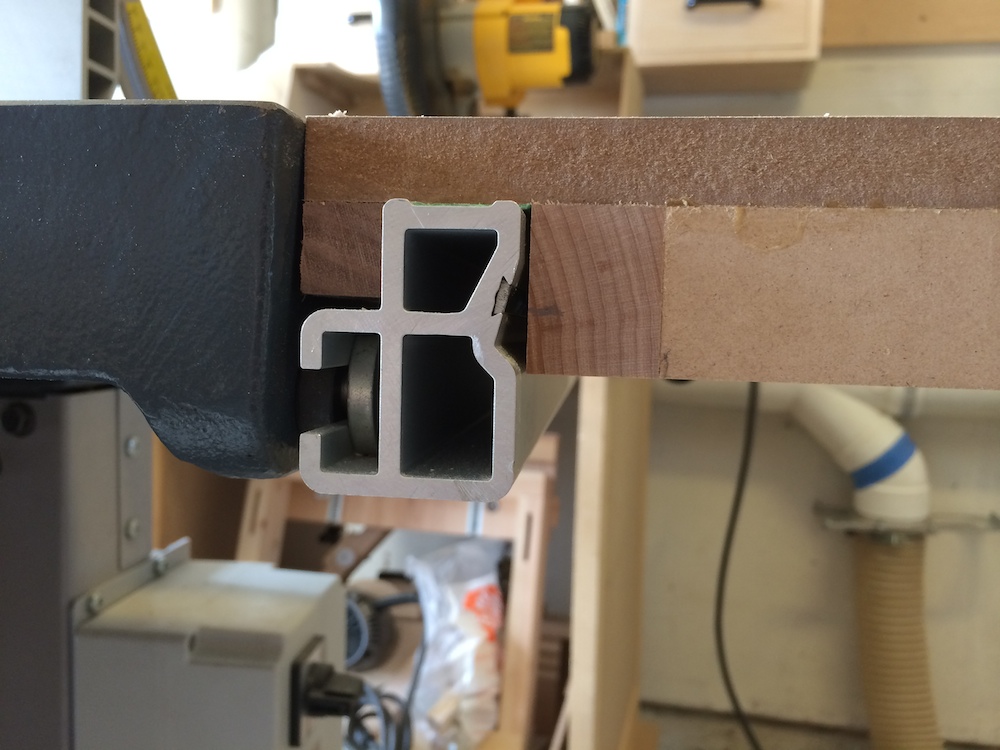
The in-feed table extension attaches to the fence rail.
The in-feed side connects to the jointer using a hard wood cleat that is screwed to the underside of the MDF surface and bears against the fence mounting rail.  I attached the cleat square with the end of the MDF top, then I placed a 1/32″ shim between the fence rail and a hard maple block.  The hard maple block was drilled and tapped for 1/4″-20 bolts that press against the angled steel strip that is embedded in the aluminum fence rail.  This attaches pretty much exactly how the Hammer fence attaches.  Before installing the bolts, I rounded over their ends with a file to prevent them from gouging the steel strip.  I added the MDF ribs to the underside after installing the maple block.  Then, I had to level the MDF surface with the jointer table top.  I thought about all kinds of cool stuff like maybe a couple of nylon grub screws set into the top surface or opposing wedges or … some other wild contrivance that I didn’t have on hand at the time.  And I ended up just stacking strips of masking tape between the blocks until it was level, which worked just fine and saved me a trip to the store.

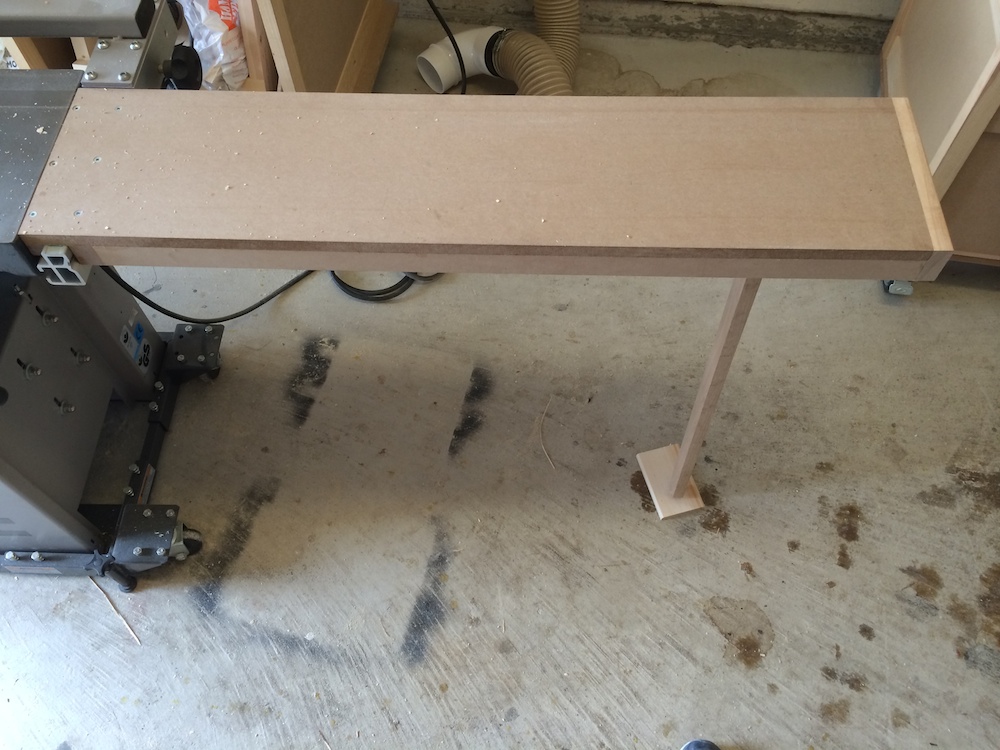
The out-feed extension table is bolted through the factory extension mounting holes.
The out-feed side is much simpler.  There is a single block of hardwood on the out-feed side with two bolt holes that mate with the pre-existing holes on the jointer bed.  The hardwood block is a little longer than the width of the extension table just because I didn’t have a 10″ wide piece of MDF for the top – I was limiting myself strictly to scraps.  The only tricky bit here is that the existing holes are counterbored so that they’re square with the jointer bed.  To overcome this, you need to add some spacers between the jointer bed and the extension.  I made my spacers by drilling a hole through some 1/2″ thick maple then sawing out an octagon around the hole, and sanding them round with a disc sander, but if you have some washers of consistent thickness around, they’d do just as good a job.  I used 1/4″-20 bolts with wing nuts to hold the table in place.  I made sure that the bolts had some play to allow levelling the extension’s surface to the jointer bed, and levelled it by placing my 4′ level across the joint and tightening the bolts.
The way I did the legs was the weak point of this design.
Each side has a single leg with a simple levelling foot made from a T-nut and a carriage bolt.  This was the weak point – if I ever use these things again, I’m going to improve the leg by using a proper rubber levelling foot and a more sturdy attachment from the leg to the table that can fold up when I go to put it away.  It’s significant that there’s only one leg though, and it’s centred.  Having 2 legs would make levelling the tables to the jointer much more difficult, and wouldn’t add much additional stability.  Once the tables were levelled with the jointer bed at their attachment ends, I used the carriage bolt to level the far end, again setting my 4′ level across the table.
The dimensions of my extension tables were entirely dictated by the scraps I had on hand. The tops are 8 1/2″ wide and about 36″ long, and the ribs are about 1 1/2″ deep.  The parts came entirely from my off-cut bin, so the cost was negligible.  It worked great,  My 9′ board came out fine and I didn’t have to strain to do it.  I’m sure that I could find flaws in the result if I looked, but it looks smooth and straight to the naked eye.
Installing these is a bit of a pain.  It’s important to make sure you’ve got enough clearance to run the board through before you level off the tables, and then you have to remember not to accidentally bump those legs.  Don’t ask me how I know either of those things.  Also, you can’t adjust the depth of cut without re-levelling the in-feed side.  If I was going to be doing a lot of longer jointing, I think I’d invest in the ready-made versions, because they look considerably easier to install.  But considering that the last time I dressed a board this long was over 4 years ago, a little bit of hassle on the rare occasion that I’ll need these is fine.