Tent for Spray Painting Outdoors
My entertainment centre is coated with General Finishes Enduro White Poly. Â I really liked the results I got with this finish, but I found it a bit messy to work with. Â In particular, it seems to travel further through the air without drying than some of the clear coats I use and it left a little bit of an outline of the entertainment centre visible on my driveway. Â I have continued to use it, but rather than just spraying right on the driveway, I decided I should make an effort to control the overspray a bit better.
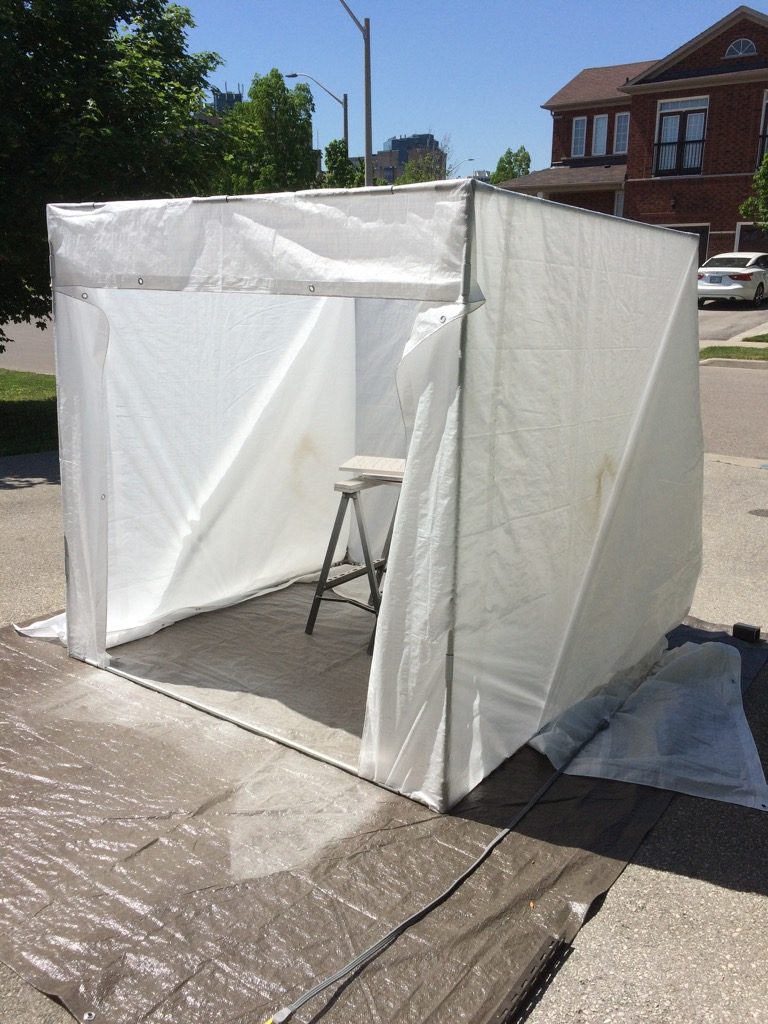
All set up and ready to go
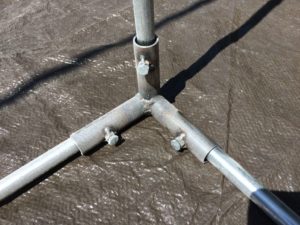
A corner bracket with the conduit frame as assembled
The tent is covered by a 16’x20′ tarp, and it sits on top of a 10’x12′ tarp. Â The frame is made mostly of steel tube and 1/2″ metal conduit. Â The corner brackets are 1″ OD steel tube welded together. Â I coped the two bottom tubes around the vertical tube and MIG welded the three parts together. Â Then, I drilled 5/16″ holes and welded 1/4″-20 nuts over the holes and used 3/4″ long 1/4″-20 hex head bolts to press against the conduit to secure it in place. Â The conduits are just cut into 6′ lengths to form a cube-shaped tent frame.
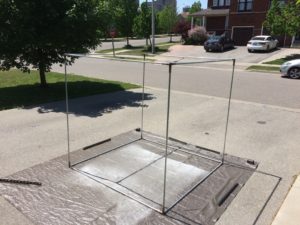
The tent frame assembled.
The tent frame is easily assembled in about 5 minutes, and it’s light enough that I can carry it with one hand if needed. Â Being a 6′ cube, it’s a little impractical to actually do that though. Â I weigh down the edges of the bottom tarp with whatever bits of steel I have hanging around at the time. Â Since the conduit comes in 10′ lengths, I can easily reconfigure the tent to be a little smaller by using the 4′ offcuts instead of the 6′ lengths that I usually use. Â Assembled, the tent is just barely heavy enough that it won’t blow away in a light breeze.
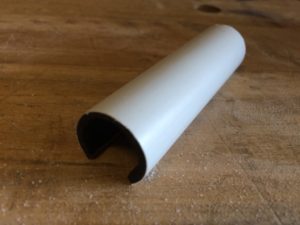
One of the clips I use to secure the tarp to the tent frame.
The tarps are held in place with small sections of PVC pipe that I slitted open along their lengths using my table saw sled and some clamping blocks. Â Unfortunately I forgot to snap a picture of that setup. Â It is fair to say that using a table saw for this operation requires careful thought to work holding to complete the task safely. Â They are very quick to use – I just put the tarp where I want it and press the clip over the conduit. Â It snaps in place and it is quite a snug fit.
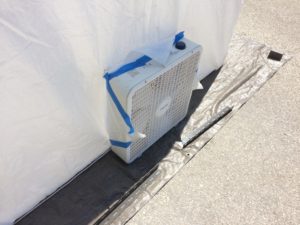
A box fan isn’t an appropriate ventilation method for a spray booth.
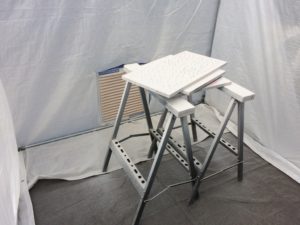
The lazy Susan and saw horses with a frosting of white overspray.
For ventilation, I set up a box fan with a furnace filter taped to the front of it. Â This is really not the right thing to do. Â First, it doesn’t draw enough air through to properly clear the overspray fast enough. Â Second, the 20″x20″ furnace filter doesn’t have enough surface area, and it loads up very quickly with paint. Â It needed to be replaced after just one project. Â Fortunately they are cheap, but a proper fan and filter setup would probably be better. Â Also, it is worth noting that even though I was using waterborne finishes, I didn’t feel too good about having the fan motor in the exhaust air, even though there was a filter in between. Â So while the tent itself works well enough, I would recommend that anybody who is considering doing something similar consider a more appropriate ventilation setup. Â I am thinking I will look in to a belt driven fan and proper paint filters at some point.
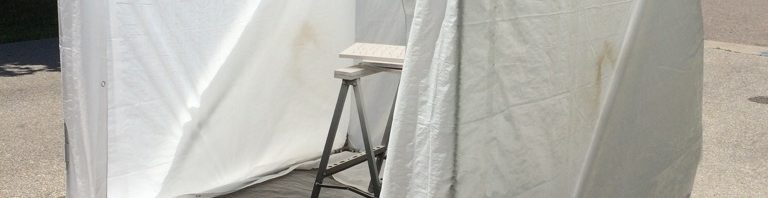
Inside the tent, I set up a lazy Susan on sawhorses. Â It is important to be able to rotate the workpiece inside the tent because the fan doesn’t draw enough air through to pull overspray into the tent as you get away from it. Â The overspray really does need to be directed as close to the fan opening as possible with this setups inadequate air flow.
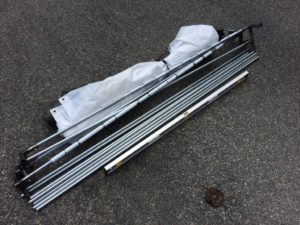
Disassembled for storage.
Between projects, the tarps roll up and the frame comes apart small enough that it can easily be bound together with a bungee cord and stored away. Â I have been keeping it bundled up on my lumber rack for the most part.
I have used this setup on two projects so far. Â With my spray gun, using this particular coating, I need to turn the air pressure up just a little bit more than I would like to in order to get a nice smooth finish. Â The tent kept the overspray under control enough to prevent a mess on my driveway, car, and nearby plants the first time I used it. Â On the second project though, the filter had clogged up a bit and a small amount of overspray escaped through the doorway.
So overall, I’m pretty happy with the tent itself for the times that I need it it’s going to work fine. Â I only spray 3-5 projects a year so spending a huge amount of money on something more sophisticated doesn’t make a lot of sense to me, but I will definitely be keeping my eyes on Kijiji for a more suitable fan setup. Â I am hoping to find a ventilation fan that I can use for both this and for welding, because even though I only weld with the garage door partially open, it does get a bit smokey in there, particularly when I’m using flux core wire instead of MIG wire.