Upgrading a Delta 50-760 Dust Collector with an Oneida Super Dust Deputy
One of the problems with canister filters is that they work really well, and an air filter’s job is to remove particles from air. Sounds silly to say it, but after you install a canister filter on a dust collector, you’re going to find yourself having to clean it, especially with a single stage dust collection system, and cleaning it is definitely no fun. It’s better that those particles are in the filter than in my lungs, but it’d be even better still if they were in a nice easy-to-empty bin, which is where pre-separators come in.
 The Oneida Super Dust Deputy is small cyclonic pre-separator that can be installed between dust producing machines and a dust collector to reduce the amount of dust that reaches the filters. For some reason that I have difficulty understanding, some people get really intense about dust collection, so just to put things in perspective, here are my goals and parameters for installing this:
- I’m reasonably satisfied with the performance of my existing dust collection system when the filters are clean. It’s definitely not up to commercial air quality standards, but I use a very good dual cartridge respirator when I feel I need it, and I blow the dust out the door whenever the weather permits.
- My main goal is to not have to clean my filter so often and slow the gradual loss of airflow that occurs as my filter loads up
- Having spent all together too much time reading about this stuff, I’m well aware that I’m never going to get perfect separation efficiency or pull enough air through this 4″ system to meet industrial air quality standards – I’m taking the middle ground here and reducing dust, not eliminating it
- Since my shop is small, I am having trouble justifying (and squeezing in) a “proper” dust collection setup, but it’s pretty likely that if I ever end up in a larger space, I’ll be bumping up to a 3-5hp setup because my pipe runs will be longer and this system won’t be able to keep up with that level of static pressure loss.
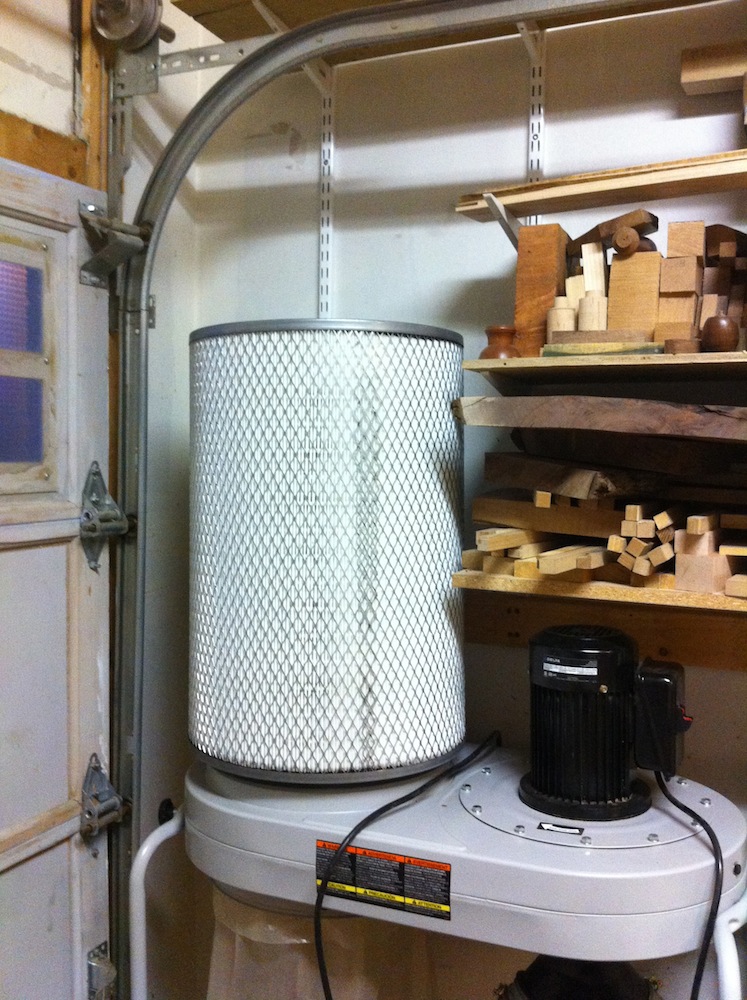 Since I’m trying to reduce cleanings, and this is very difficult to measure in the short term, this article isn’t a complete review – I’m going to have do a followup post at some point to cover my experience with the performance of this setup. However, what I will talk about here are initial impressions and the process that I went through to integrate the Super Dust Deputy into my setup. My starting point is a Delta 50-760 dust collector that has been upgraded with a canister filter, and which I have piped to my various machines with 4″ sewer and drain PVC pipe.
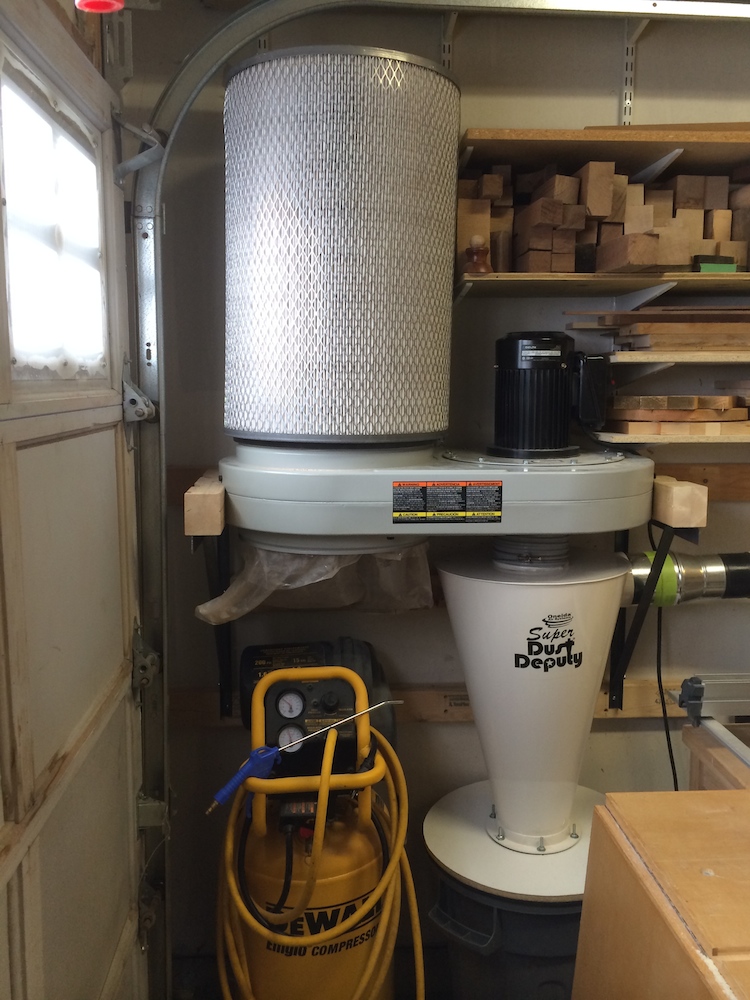
The first problem I had to solve was that the Delta 50-760 isn’t tall enough to fit a dust bucket and a Super Dust Deputy inside the cart. I decided to make a steel shelf bracket out of angle iron and mount the dust collector body on the wall. The original tubular steel cart wraps around the blower housing, so I cut up a bit of 4×4 to conform to the radius of the blower housing, and ran some 5/16″ bolts through the 4×4 to secure the blower to the shelf brackets. Since the blower doesn’t line up neatly with my wall studs, I screwed some 2×4 to the wall to provide a solid mounting for the brackets. Since the separator should nearly eliminate chips getting to the filter, I drastically reduced the size of the collection bag underneath it. This arrangement has two significant bonuses: my compressor fits underneath the left side of the dust collector, and the leg of the cart no longer obstructs my table saw as much, so I can rip a few inches wider without having to move the saw. The new home for the compressor is definitely welcome, as it never really found a permanent home before and was always in the way.
 Oneida Air Systems sells fibre and steel drums that can be used with their dust collectors, but my dealer didn’t carry them or anything similar. I used a plastic garbage can of reasonable thickness so it wouldn’t collapse under the suction, and I took some 1/2″ melamine particle board and cut a couple of circles, one to fit inside the rim, and one to sit on top. I screwed them together with the centres aligned, and along the edge, I used some 3/8″ thick closed cell weather stripping to create a gasket. In the centre, I cut out a 6″ hole with my jig saw and bolted the super dust deputy directly to the melamine. The bolts Oneida supplied were a little too short for the full inch of melamine, so I supplied my own. I was not impressed with the thin piece of weather strip that Oneida supplied for this joint, so I used some of the remainder of what I bought. The garbage can isn’t tall enough to reach the bottom of the cyclone, so I have it blocked up on scrap 2×4 bits to compress it against the gasket and keep the seal. There is just enough play in the connections to lift it slightly and kick out the 2x4s to lower the bin. I’ll probably improve that setup at some point.
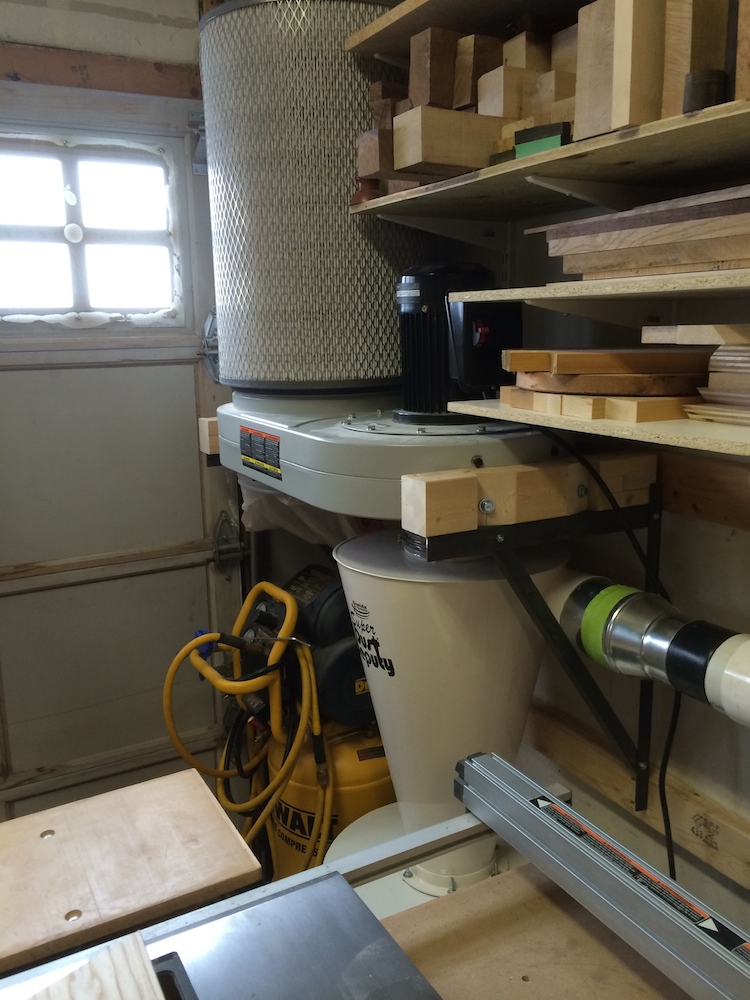
Connecting it to my pipes was a bit time consuming. Some say that a bit of straight pipe on the cyclone inlet helps with separation performance, so I redid a section of my piping to provide that. This had a nice side benefit of making my table saw’s blast gate much easier to reach, but also required me to re-arrange how I store some items on the wall.
Unfortunately, in my effort to squeeze as much into as little space as possible, I mounted the dust collector too close to the garage door, and when I tried to open the door, it knocked the canister right off the machine and jammed the door. These pictures were all taken before I completely disassembled the whole thing and moved it 3 inches to the right. Measure twice, install your dust collection system once. D’OH!!!
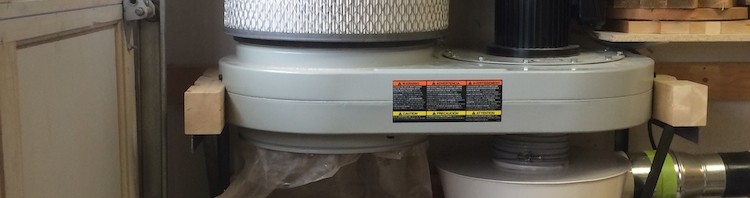
The Super Dust Deputy itself looks pretty nice. The paint is nicely done, and there aren’t any sharp edges on the outside of it. I found some burrs on the sheet metal inside, but that’s really not somewhere you’re going to be sticking your hand much. The inside of the cone is very simple – there is no “neutral vane” or air ramp inside. It’s pretty much just a cone with a top, a bottom flange and a couple of pipes. The joints are sealed with caulk, and the caulk was wiped over the paint near the seams, but since it didn’t adhere to the glossy paint, it rubs off pretty easily. Oneida has been doing this a long time, so I will trust that this is adequately sealed, but it doesn’t leave me feeling good about durability or that I would have had any difficulty building something of the same quality myself. Another thing that diminished my impression was the user manual. Now, this isn’t a complex device, but the user manual they supplied seems to be for their smaller shop vacuum Dust Deputy product. In a 22 page user manual, only one single page addressed the actual product I bought. Considering all these factors, the CAD $285 plus tax that I paid for it seems a little hard to justify, and it will have to prove itself quite effective over the next year for me to feel truly good about this purchase, but I will definitely give it a chance.
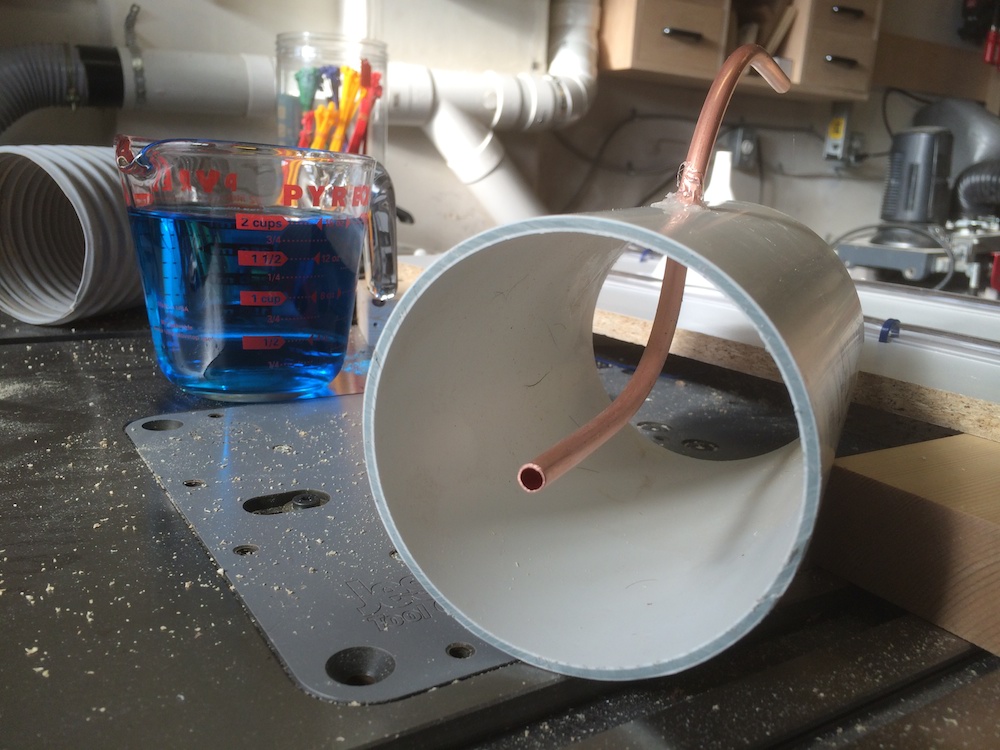 Installing a pre-separator costs you air flow. There is no way around this fact. But then again, a clogged filter costs more. So to get some sense of how much airflow I was losing, I decided to borrow some ideas from Matthias Wandel’s article, Characterizing the cyclone. Specifically, I built a simple manometer and pitot tube with 3/8″ flexible copper tubing, that I bent into a shape that would let me insert it into a scrap piece of 4″ PVC pipe, and I used hot glue to hold it in place. My Manometer is just a length of clear 3/8″ ID vinyl hose that I slipped over the end of the pitot tube and formed into a U shape on some scrap melamine using zip ties. The air flow in the pipe reduces the air pressure in the copper tube, which in turn reduces the air pressure in the clear vinyl hose and sucks the water up the loop a little bit. I used blue food dye to make it show up better in the pictures. The distance that the water is pulled up the tube indicates how much air pressure there is. With some math and a couple of additional setups, you can use pitot tubes to calculate the air velocity and static pressure, which can in turn be used to calculate the total air flow, but I was satisfied with a simple demonstration of the principal without getting into the numbers.
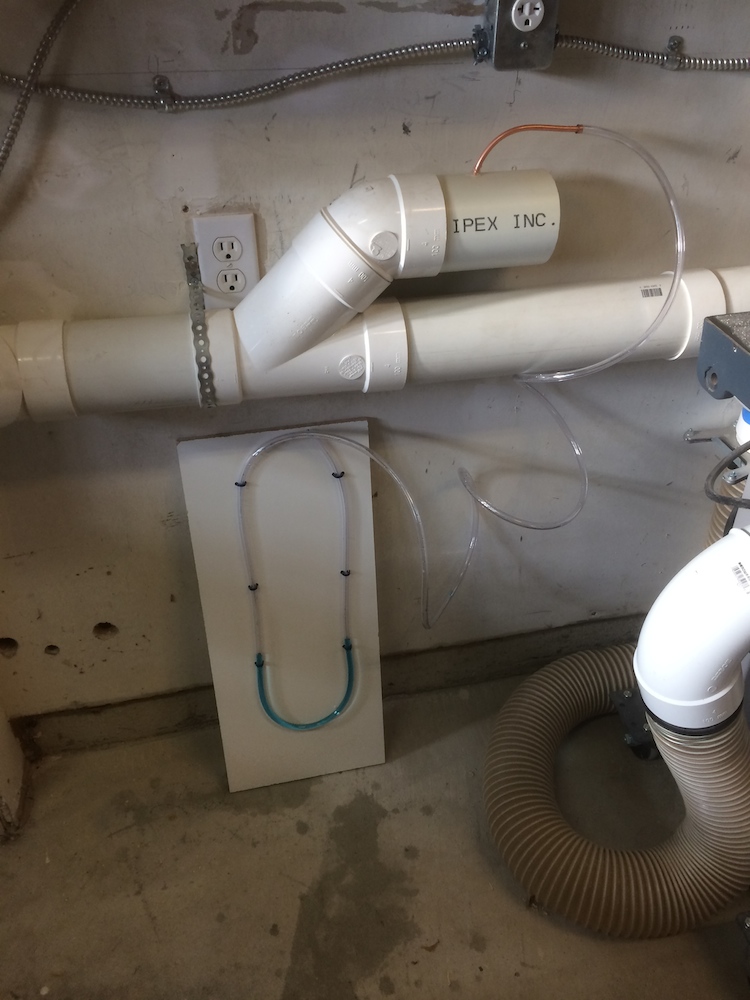 I installed the probe at my mitre station inlet. My intention here was to read the air intake at a real point of use, and to use as close to the same setup as possible for both tests. I tested at this same point with and without the super dust deputy installed. Without the Super Dust Deputy, the collector was connected to the pipes using 3′ of flexible hose and the Y connector that Delta supplies with the 50-760. With the separator in place, I used a ring of plywood glued around the 5″ inlet on the 50-760 to hold a 6″ length of 6″ diameter hose running to the outlet on the Super Dust Deputy.
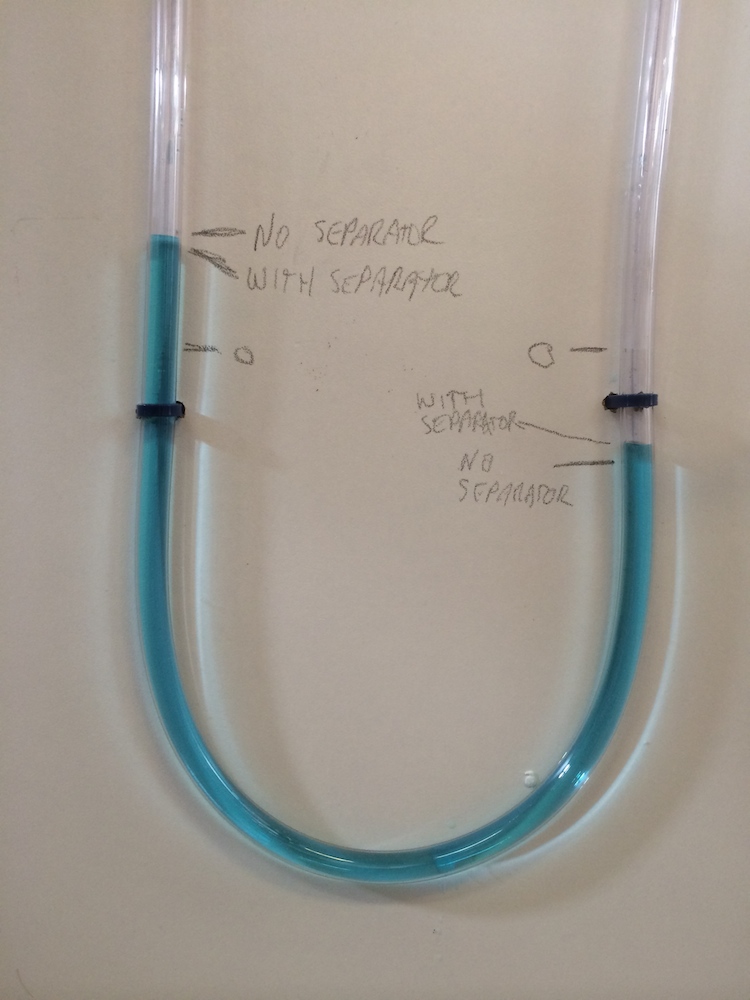 I’m pretty amazed that such a simple apparatus can tell someone so much about airflow. It’s so simple that I have trouble trusting that I did it properly, but it seemed like an interesting experiment, and it gave me a way to visualize the approximate change in airflow. If anyone reading this spots any mistakes I made with this test, please do add a comment below. I’m not going to make any judgment calls based on this, and I’ll just include a photo of the readings to allow people to draw their own conclusions. The photo shows the manometer with the dust collector running with the separator installed. The readings are marked in pencil.
My over-all feelings about this upgrade are a mixed bag. I bought it because I didn’t want to go to the trouble of building a separator myself and I didn’t want to get a full-blown cyclone right now, but I do want to save time cleaning filters. However, the total cost of this upgrade including tax, hardware, brackets, the Super Dust Deputy itself, the garbage can was around $500, plus the 4-5 hours of work setting it up, re-configuring my pipes and storage. I’m hoping that as I keep tabs on the performance of this over the next six months or so, I’ll be able to say that it saves me a lot of time and keeps my airflow going strong, which would make the whole thing worth while.
Pros:
- Incremental improvement – compared with replacing my whole system with a “proper” cyclone, this is much faster and cheaper
- Recovered some floor space that was wasted by the original 50-760 cart
- Recovered some rip capacity on my table saw that was obstructed by the 50-760 cart
- If it works, my airflow should remain more constant and cleaning should be reduced
Cons:
- Lost a little bit of airflow
- General fit and finish left me feeling like the price is a little high
- Setup was time consuming and this is really a component in a system that you are expected to design and build with only general guidance
So at this point, I’d estimate that I’ve spent somewhere around $1800 on my dust collection installation including the pipes, hardware, machine, materials, filter and separator, and probably 40-50 hours, but not counting time spent researching things. I guess this may explain why people get so uptight about dust collection, because while my current setup does seem to be more or less meeting my expectations at the moment, I’m pretty sure that this isn’t going to be my final setup, and the price difference between a “proper” setup and what I have right now isn’t as much as one might expect. I guess they’re just trying to help people avoid the expensive upgrade cycle that I suspect ends with a full blown cyclone system in many cases.
But then … who knows when they start out with a woodworking hobby that they’ll eventually be willing to spend that kind of money on something they’re not really sure they need in the first place?
Comments: 1
[…] fitting connects to my tools.  I have it set up to the right of my work bench and connected to my shop dust collector and it seems to be working well enough with the tools I’ve connected to it.  I […]
Comments are closed.