Bench Stand-offs
Lee Valley recently started offering a non-slip pad material in 1″, 2″ and puck-sized self-adhesive discs. They even sell the pucks. Well… if you’re on the fence about these, don’t give it a second thought. What a useful product!
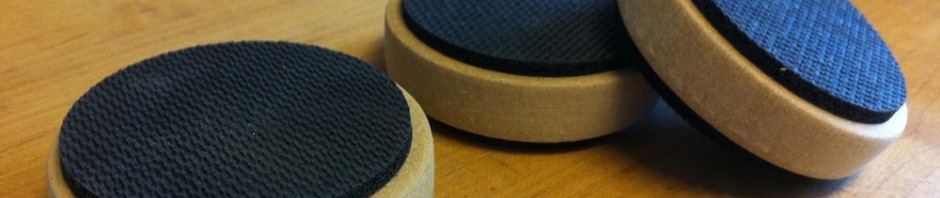
I got a package of the 2″ discs and stuck them to some roughly 2″ discs of 1/2″ thick MDF I had lying around forever. A package of these discs was $5, the MDF was scrap, and now I have a dozen useful little stand-offs for using power tools at my bench. I was slightly skeptical before I saw these in person, but with minimal downward force, 4 discs were absolutely adequate to keep a 1′ by 1′ piece of 3/4″ ply from sliding around under my sander. I’d have absolutely no hesitation about using these under a piece for edge routing, biscuit joining, dowel drilling or circular sawing (with 4 on each side of the cut). The difference between this stuff and a cheap “router mat” sheet (which was basically just overpriced foam drawer liner) is night and day.

Like I said, Lee Valley is offering hockey pucks with appropriately sized discs and I’m sure those would work really well. I had a bit of a cheap-attack though and decided to use up some scrap MDF. Given how long it took to cut out and sand a dozen discs, it’d probably have been worth the money to buy the pucks. Here’s what I did:
- With an adjustable circle cutter on my drill press, I cut out a dozen discs at 2 1/8″ inch in diameter. I used 1/2″ MDF because it’s cheap, flat and a consistent thickness.
- At my lathe, I mounted a block in my chuck and turned a jam chuck for the disks with a centre tenon to match the centre hole from the circle cutter, and a concave face for the disc to rest against
- I mounted each disc on the jam chuck with the lathe running by using the live centre to press the disc onto the jam chuck
- I sanded the edges and rims of the discs with 100 the 150 grit, because my circle cutter really butchered the sides of the discs and left a raised lip on the face.
- After wiping off the dust with a tack cloth, I peeled and stuck the non-slip discs to the MDF discs
I was originally planning to dunk these in wipe-on poly or shellac to give them a little bit of moisture resistance, but I got impatient. I guess we’ll see how that works out for me.
Total cost: $5 + tax, 1 useless piece of MDF that I hadn’t gotten around to throwing out yet, and 1 hour. They have sheets of the stuff too, so putting together square versions of these would be even faster!