Shop-made Bandsaw Fence
I really like using my bandsaw for ripping. Whenever I can get away with the slight reduction of precision and the inferior surface that it produces in comparison with my tablesaw, I prefer the bandsaw because it just doesn’t seem as dangerous to me. I bought mine without a fence and for a while, I tried the “clamp a straight board to the table” approach recommended in various well known books and magazines. However, I got fed up with all of the setup steps required for that and found that quite often, I was just skipping it and free-handing my cuts, so I decided to get a fence. After looking at the prices and reviews of various aftermarket fences, I decided that I’d try building one instead. I could always fall back to the store bought one if my own approach failed.
My design goals:
- The face of the fence needs to be square to the table, which means that when the table is square to the blade, the blade and fence face are parallel (within reason)
- The fence must adjust for blade drift to a reasonable degree. Since blade drift changes slowly once the blade is fitted to the saw, this only needs adjustment at blade change time (which I don’t do as often as I perhaps should) and when the cut quality shows that the drift has changed
- I wanted the fence to lock on both sides of the table for stability because I often rough-size my parts before jointing or planing to reduce waste, which means that I often rip boards that are 4-7 feet long
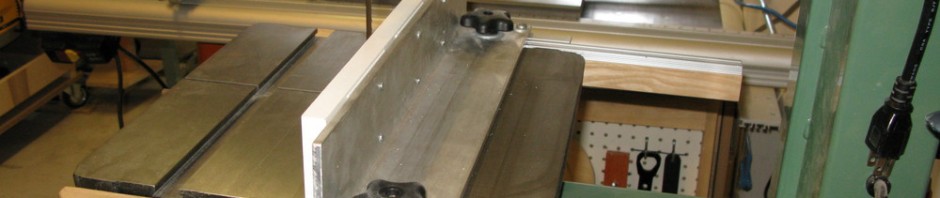
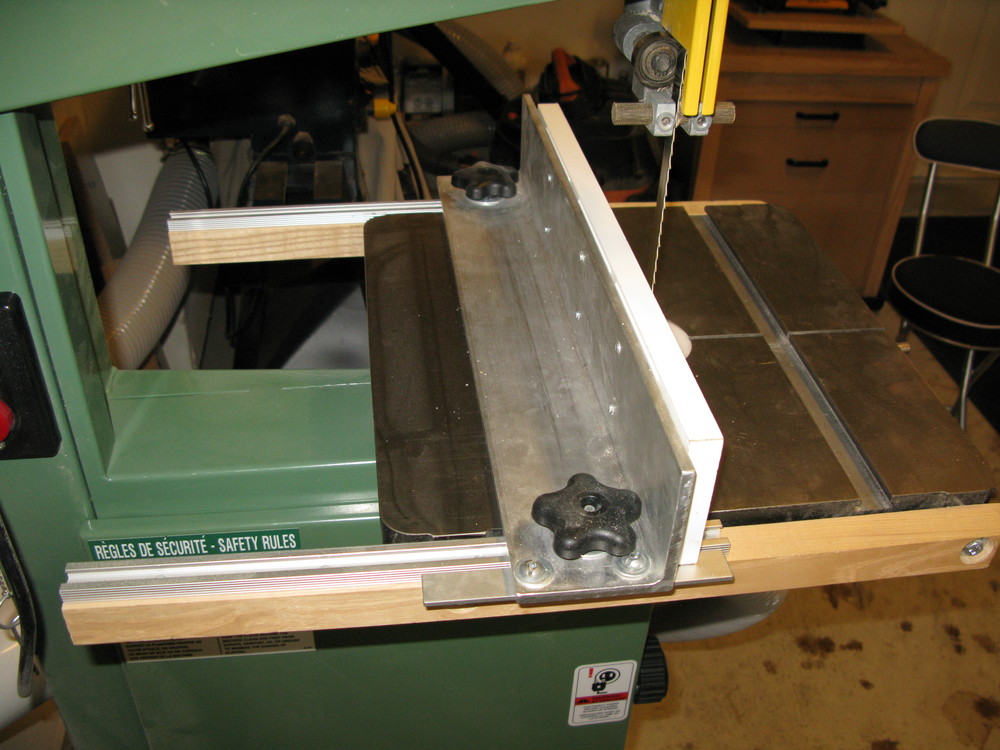
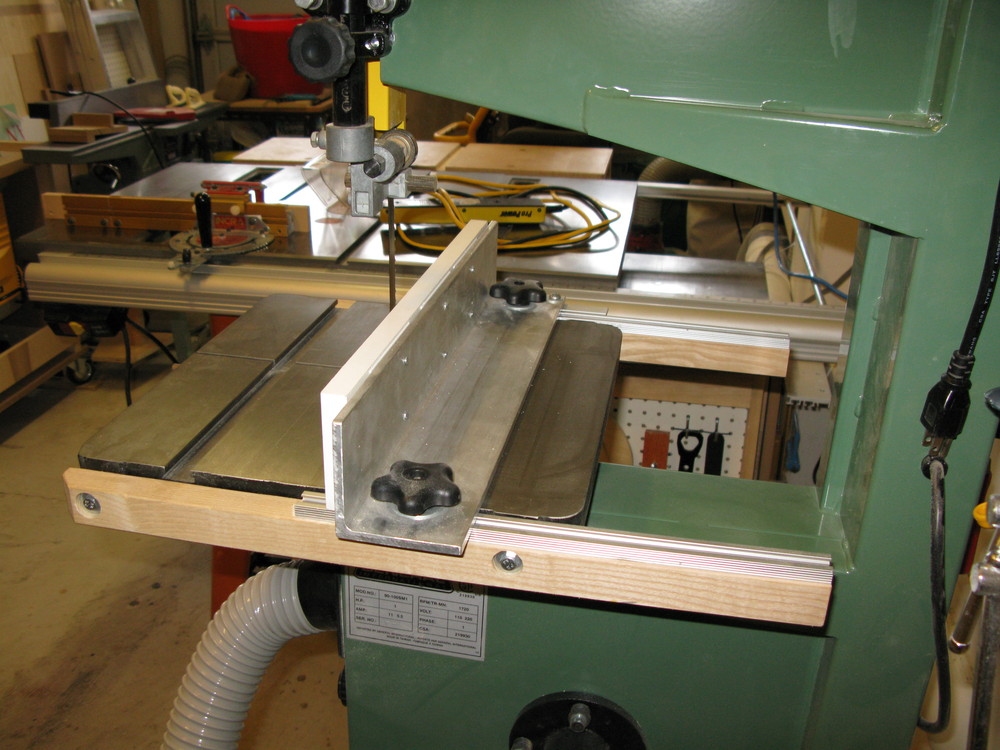
So here’s what I came up with:

And a few construction notes:
- The aluminum angle I got was 3″ x 3″, 1/4″ thick, but wasn’t square enough. I drilled and tapped it to accept a melamine face, then shimmed the melamine face square. I originally intended to make different height faces for resawing, but have never bothered. I’ve resawn 6″ wide veneers with no problems.
- The star knobs are in considerably oversized holes to allow for drift adjustment, and fender washers cover the hole. The bolts are 1/4″ but the holes are 1/2″.
- Similarly, the aluminum angle alignment rail on the front has oversized holes connecting it to the fence that allow adjustment for drift
- The rails are some ash scraps I had sitting around, which I drilled to match holes that already existed on the table edges. I used a tap and die set to figure out what size bolts I needed, which turned out to be metric.
- I have occasionally regretted not running the T-track all the way across the top of the rail, but the fence as it is wouldn’t work on that side of the blade anyway.
- I set the T-track flush with the top of the table by leaving the rail mounting holes a little loose, clamping a board across the top of the table, and touching the t-track against the board as I tightened the mounting bolts.
- The rails are sized to avoid interfering with the mitre slot on the table.
- Making a low fence out of wood would be really, really easy – I’ve just never bothered. However, for narrow cuts, the fence interferes with lowering the blade guard. Obviously, that’s a bit of a design flaw.
- Removing the fence requires removing the star knobs, lifting it off, then removing the T-slot bolts from their tracks.
Comments: 1
Excelent bandsaw fence, can you send me the plans for making one similar at home?
Thankis, I appreciate
Carlos
Comments are closed.