Sharpening an Oval Skew without creating facets
I have a couple of oval skew turning chisels. A lot of the comments I’ve seen about oval skews indicate that a major flaw with them is that they’re quite difficult to sharpen. My skills at the grinder leave much to be desired, so I did some digging on various forums to try and find out how people sharpen these things.
After sharpening my skew free hand on my grinder’s tool rest a few times, I found that I had four problems to solve:
- The edge I was getting wasn’t straight because it would rock
- Since there are two faces, the effects of the edge not being straight were doubled because I was messing it up on both sides
- I wasn’t getting my arcs the same on both sides, which contributed to the unevenness of the edge
- I wasn’t taking an even amount of material off of each side, so the bevel would be noticeably longer on one side than the other
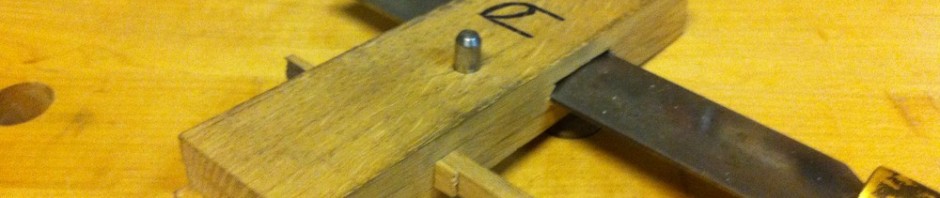
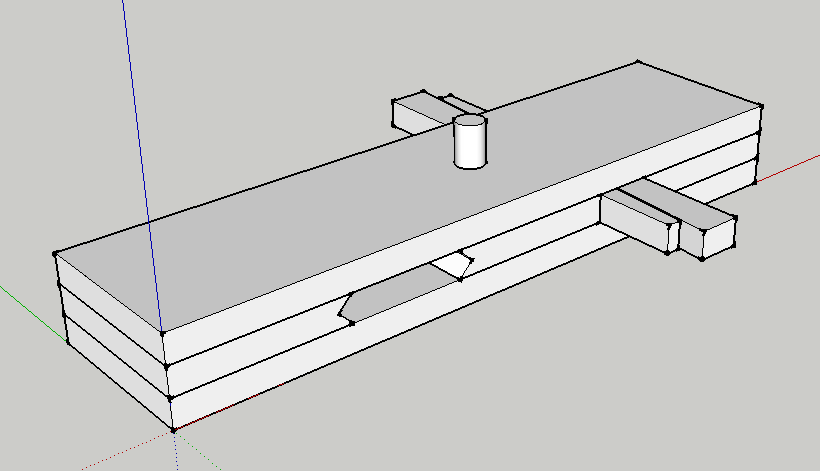
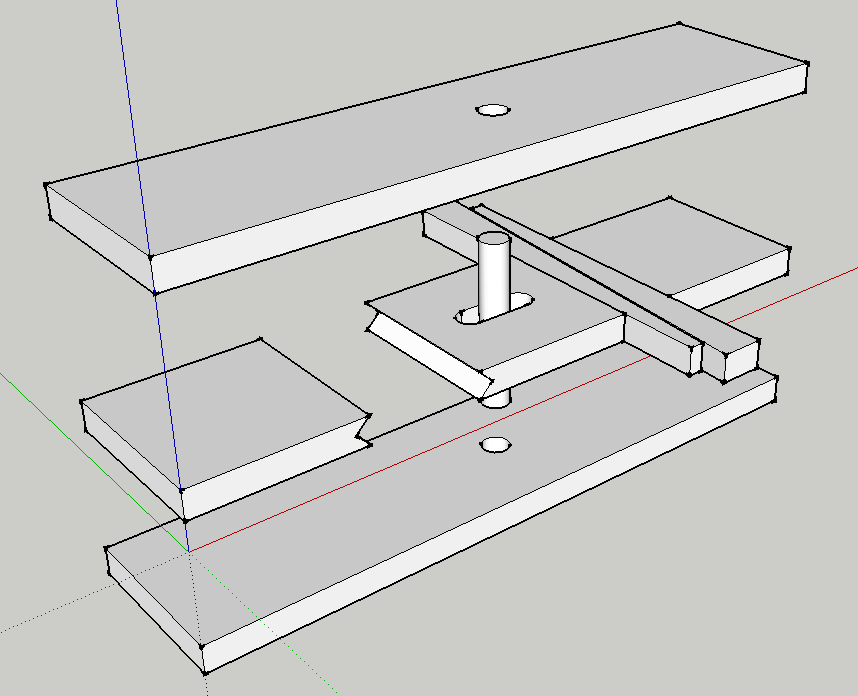
My solution is a fixture with flat parallel faces to run over the tool rest that grip the tool along the edges in V blocks to hold it at a consistent angle and distance in relation to the parallel faces. I can’t take full credit for the idea, as it was described in passing in one of the many forum posts I read, but hopefully someone will find these drawings and photos useful.
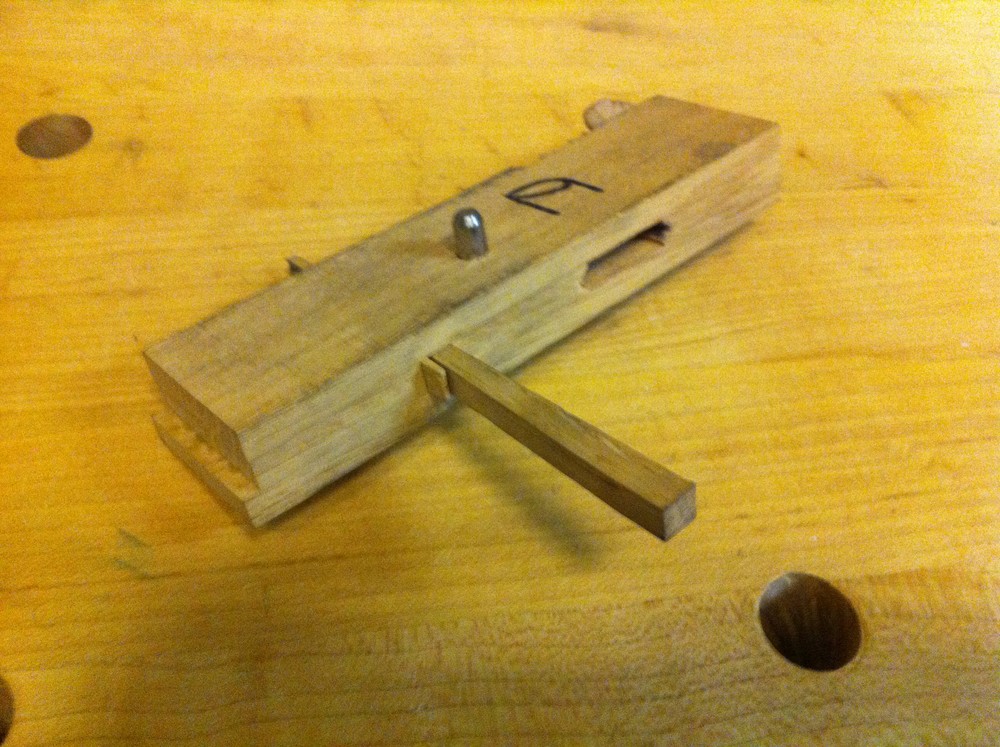
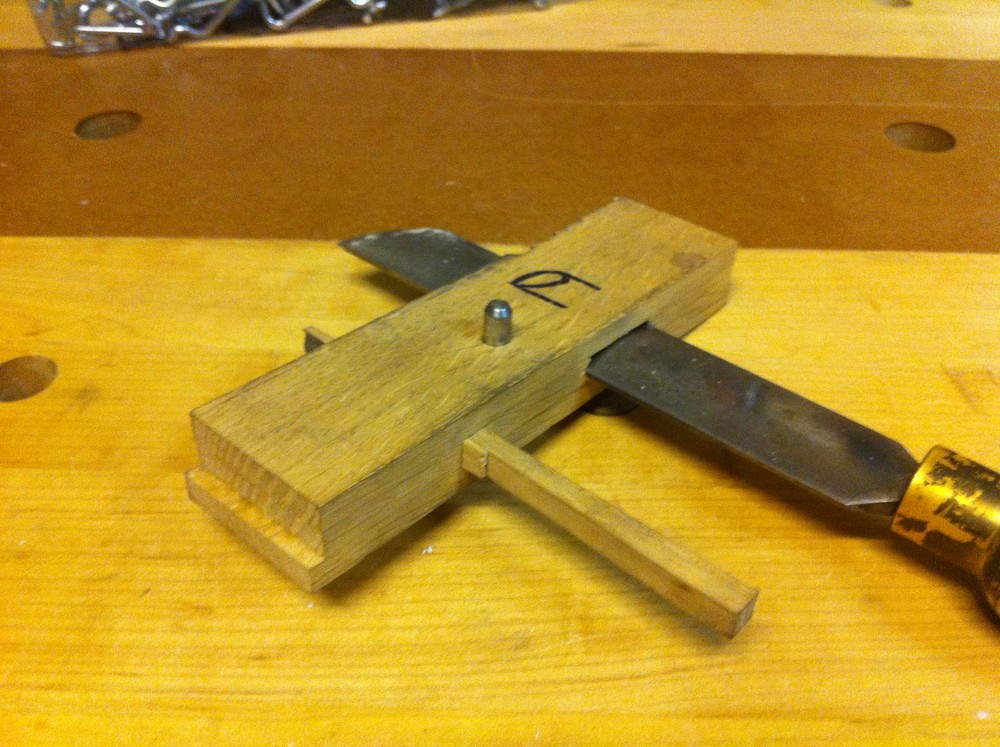
To use this, I push my skew through to protrude a distance that I measure for consistency (some people set up stop blocks for this), wiggle it to make sure it’s centred in the V-grooves, lock it in place with the wedges – I’ve found hand pressure adequate. Then, I set one face of the fixture on my grinder tool rest, set the pivot pin against the rear edge of it, and set the angle of the tool rest to match the tool. It should be touching the wheel. If I need to grind out a bad nick in the blade, I’ll set it up so that when the pin is in contact with the rest, the cutting edge is a hair’s thickness above the wheel and the heel of the bevel is in contact.
Lock everything down and start the grinder. I make sure I’ve dressed the wheel so it’s running smooth and set the pivot pin against the rear edge of the tool rest. Pivoting on that point gives me a nice round arc. I have found that since the pivot pin limits the depth of cut, I get much finer scratches on the bevel than I do grinding freehand.
If you decide to build one of these for yourself, here are a few points to consider:
- Very few of the dimensions are critical except the pin location. Each layer on mine is 1/4″ thick oak, 1 1/2″ wide because I happened to have that in my scrap bin. I wouldn’t make it any thicker than that…
- The distance of the pin to the cutting edge of the chisel establishes the radius, and the centre location of the pin establishes how long your long point ends up being. Drill the hole on a drill press after gluing the fixed jaws together.
- The pin serves as the pivot and to lock the floating jaw
- The wedges will interfere with the grinding wheel unless they’re on the long point side. That’s why I have the silly little drawing of a skew on mine – to remind me.
- the V groove should be centred quite precisely – I used a V groove bit in my router table with the block mounted on something like a tenoning jig. Make sure the faces are parallel and flip the blocks so that you reference against both faces. If the V grooves aren’t centred or the top and bottom are different thicknesses, you’ll get different length bevels.
- I used a steel pin just because I had one handy and already cut to length – dowel would be fine. It needs to fit quite tightly in the top and bottom plates and slide without too much interference in the floating jaw
- The floating jaw is tiny. Don’t try to cut that groove with a router! I used a drill and a chisel.
- For a straight skew, you could add a second pin or a straight fence along both sides to establish the angle rather than pivoting. Using it without a pin would work, but you’d sacrifice the control over the depth of cut and may end up with bevels that aren’t the same length
- The two opposing wedges need to be pretty close to the same angle to keep the floating jaw parallel to the fixed jaw, and the fixed jaws need to be installed squarely. I made the wedges by sawing them on my band saw and then smoothing them with a block plane.
Once the grinding is done, I use Veritas Green Honing Compound to refine the edge until I can shave with it. I apply the honing compound to an MDF disc mounted on a face plate on my lathe, being careful to use the bottom half of the disc so that the spinning force pulls away from me. It takes practically no time at all, but it’s tricky to hold the angles right, particularly because of the arc on the cutting edge. A straight cutting edge is vastly easier to hone this way. One day I plan to rig up an MDF disc on a reversed bench grinder (so the wheel rotates away from the tool) so I can use this fixture for the honing too.
I know some people say that getting a turning tool that sharp isn’t a good use of time, but I have to say, I’m very happy with the quality of the cuts I get when it’s that sharp and I’m going to keep doing it. And I’m pretty sure that once I rig up the MDF disc on the reversed grinder, these skews won’t see the grinding wheel much.
Comments: 2
Thanks for posting this! I have been wrestling with the same problems you were, and this looks like a terrific solution!
— Gerry
Just a quick followup on the last paragraph … the skew is, perhaps, the one tool in the drawer that does need to be as sharp as you can get it. A dull skew doesn’t produce a good quality cut, and, IMNTBHO is more prone to catches than a sharp one. A mentor in my local turning club says when it comes to the skew ‘scary sharp ain’t sharp enough’.
— Gerry
Comments are closed.