Checking my Table Saw’s Alignment
I wanted a way to check the alignment of my table saw blade relative to the mitre slot, because I wasn’t satisfied with the method that the saw’s instruction manual proposed. The manual said to use a combination square lined up against the side of the mitre slot, extend the blade of the square so that it just barely touched the tooth at the front side of the saw blade, then move the square to the back of the saw blade and adjust the saw’s trunnions to ensure that the distance was the same at both the front and back.
Without actually measuring it, this didn’t sit right with me and I wanted to be a bit more accurate about it, as this particular adjustment is really critical to the quality of the cuts you get with the saw.
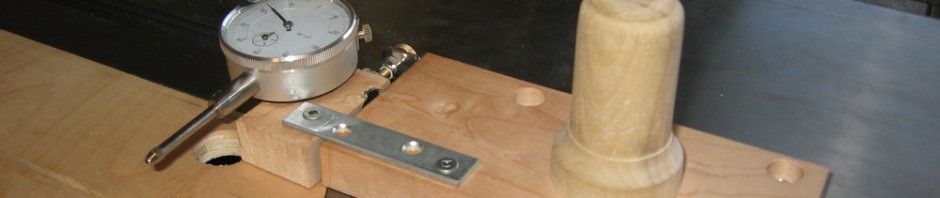
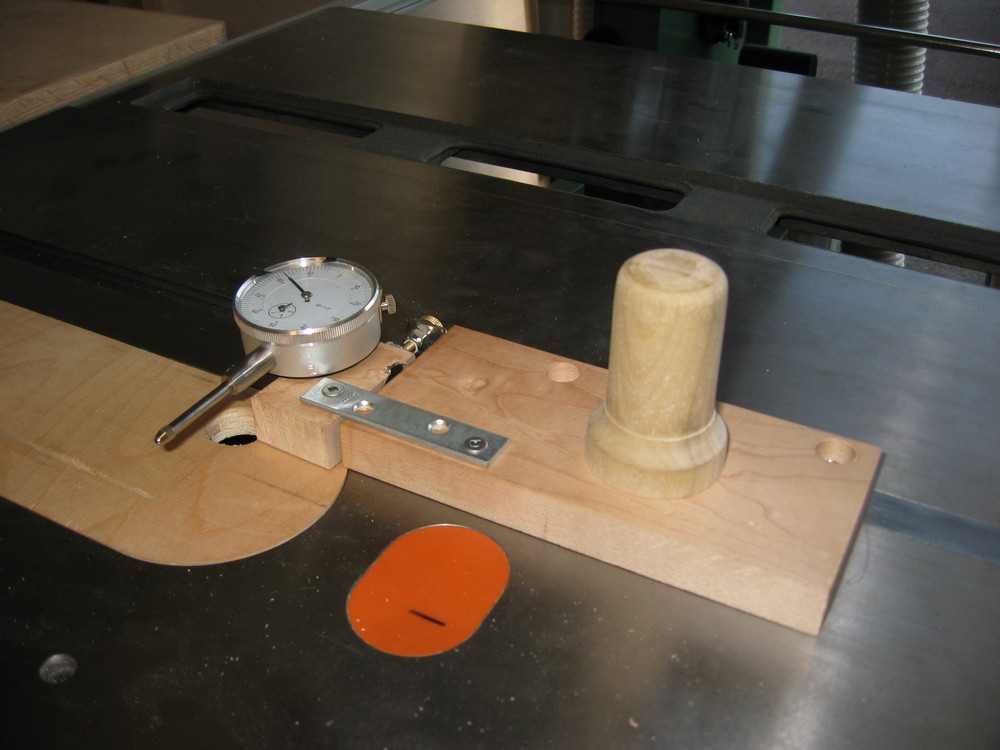
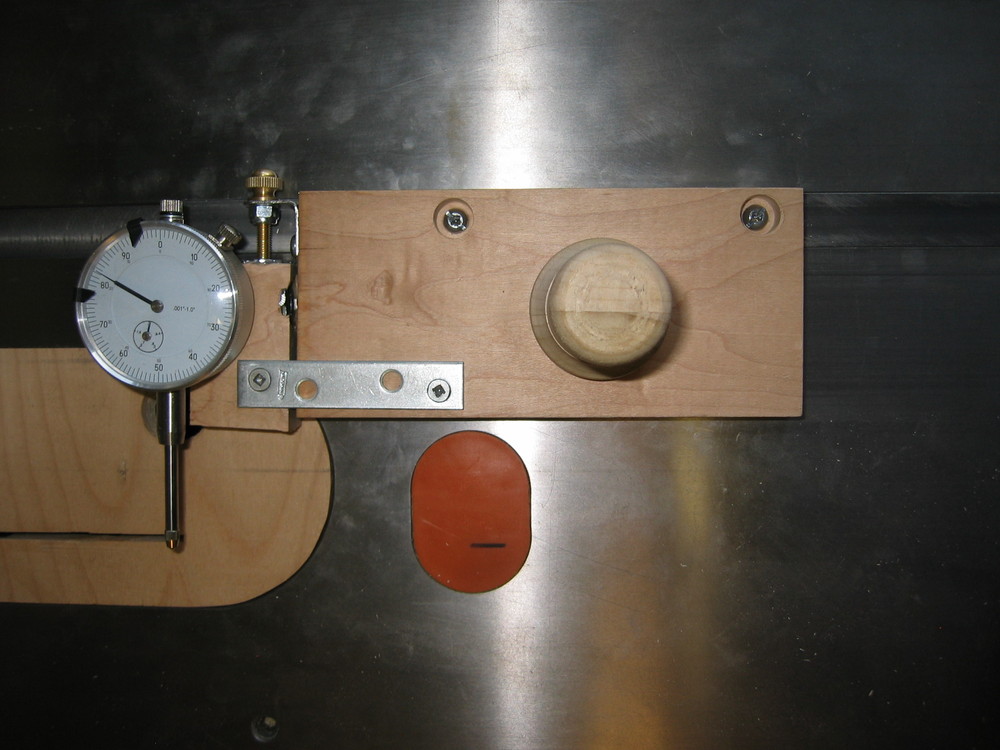
My solution was to take a block of wood and a cold rolled steel bar sized for the mitre slot. I drilled and tapped the steel bar and ran machine screws through the block of wood into the bar. Then I got a second, smaller block of wood to act as a carrier block and attached it to the first block using a mending plate and a couple of screws so the carrier block could move roughly perpendicular to the mitre slot. I set up a captured screw on a small L bracket, and connected the screw to a T nut in the smaller block to serve as a micro adjust for the position of the carrier block in relation to the blade. I mounted a dial indicator to the carrier block and adjusted the fit of the steel bar so it was quite snug in the mitre slot. I turned a knob to pull the thing back and forth through the mitre slot, and attached it with a screw.
This is a pretty accurate way to check your table saw’s alignment. First align the blade to the mitre slot, then align the fence to the mitre slot, and everything’s nice and parallel. I got my Ridgid TS3650 set parallel within 0.002 of an inch after fidgeting with it for about half an hour.

The main block on this thing was originally made from some scrap maple, but after a few months, it developed a serious cup, which caused the dial indicator to rock slightly on the table as I moved it forward and back through the slot. I have since replaced that part with a bit of scrap 3/4 inch ply wood, which has remained flat. In retrospect, the mechanism with the mending plate isn’t worth the effort – you could quite happily use this without it being adjustable at all. Just bolt your dial indicator to the plywood at approximately the right distance and have done with it.
I take this thing out about once every 6 months and make sure that the settings haven’t drifted off. This saw is doing a great job of keeping its alignments – especially given that I have it on wheels and frequently move it around and I often also use the saw as an assembly table.